Instant Pot Chili Recipe With Dry Beans


This post may contain affiliate links, see my disclosure policy for details.
A delicious recipe for homemade chili using dry beans and cooked entirely in the Instant Pot!
Using dry beans is a great, healthy, and affordable way to make chili, but they can be a pain to cook and I always forget to soak them overnight.
The solution? Use the Instant Pot!

You’ll never have to worry about pre-soaking or cooking dry beans again! The Instant Pot pressure cooks the beans perfectly in no time, without any guesswork.
With simple ingredients and the Instant Pot doing all the work, you can have a delicious homemade pot of chili on the table without spending all day in the kitchen.

Makes 8-10 Servings
Instant Pot Bean Chili Ingredients:
- 16 oz dried black beans
- 4 cups of water
- 20-24 oz ground turkey, lean ground beef, or plant based crumbles
- 2 tablespoons of olive oil
- 1 1/2 cups of sweet onion (one medium), diced
- 2 cloves garlic, minced
- 4 cups of low sodium chicken or beef broth
- 2 (14.5 oz each) cans of diced tomatoes, with juice
- 1 (6oz) can of tomato paste
- 1 tablespoon of diced chipotle in adobo sauce (optional if you don’t want a spicy chili)
Chili Seasoning:
- 4 tablespoons chili powder
- 2 tablespoons ground cumin
- 1 tablespoon smoked paprika
- 1 tablespoon garlic powder
- 1 tablespoon ground coriander
- 2 teaspoons kosher salt
- 2 teaspoons granulated sugar
How to Make Chili in the Instant Pot
1. Presoak the beans:
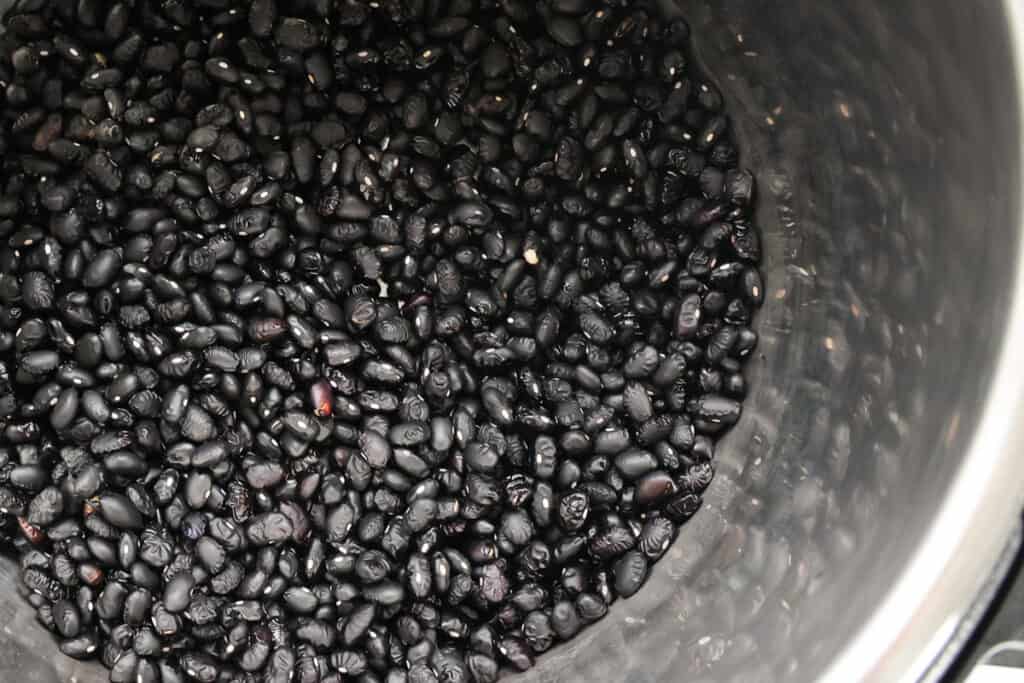
Add your dry beans to a colander and rinse clean. Pick out any funky looking beans or twigs that may have gotten in there.
Next, add the cleaned beans to the Instant Pot. Add about 4 cups of water or enough water to cover the beans by an inch.
Twist on the lid and turn the valve to “sealing”. Set the Instant Pot to “manual” or “pressure cook”.
Cook on high pressure for 5 minutes*. After cooking, allow the beans to release naturally for 15 minutes.
After the natural release, turn the valve to “venting” and allow the rest of the pressure to release. Once the pin has dropped and the steam has stopped, carefully remove the lid and drain the beans. Discard the liquid.
*It’ll take about 9 minutes for the pot to come up to pressure.
2. Making the Chili Seasoning:
While the beans soak, prepare the chili seasoning.
In a small dish, combine all of the spices, salt, and sugar and mix well. Set aside to add to the chili later.
3. Making the Chili:
After soaking the beans, clean out the pot and dry well.
Return the insert back to the Instant Pot and add two tablespoons of olive oil.
Set the Instant Pot to the “saute” function. I start on “more” but switch to “normal” or “less” to adjust the cooking temperature if needed.
Next, add the ground turkey to the olive oil in the pot and saute until the meat is cooked through, about 7-8 minutes.

Once the turkey is cooked, add the diced onion to the meat and cook until soft, about 4-5 minutes.
After the onions have become soft and translucent, add the garlic and cook for 1 minute until fragrant.
Pour in the chicken broth.
Using a rubber spatula, scrape up any bits of meat and onion that may have stuck to the bottom of the pot.
Add the drained beans, diced tomatoes, tomato paste, chipotle in adobo, and the chili seasoning, to the pot.
Stir the mixture together until combined. In a 6qt Instant Pot, this should take you a little over the 1/2 line. Press “cancel” to end the saute function.
Twist the lid on the pot and set the valve to “sealing”.
Set your Instant Pot to “manual” or “pressure cook” and cook on high pressure for 25 minutes*. Once the cooking is done, natural release for 15 minutes. After the natural release, switch the valve to “venting” and allow the rest of the pressure to release. Once the pin has dropped and the valve has stopped steaming, carefully remove the lid.
Give the chili a stir and serve with your favorite chili toppings!
*This is a pretty full pot, it’ll take about 20-25 minutes for the pot to come up to pressure.
Presoaking Dry Beans In The Instant Pot
Using the Instant Pot to presoak the beans for this recipe will save cooking time and make the beans easier to digest. Soaking will also help keep the beans intact while the chili is cooking, minimizing blowouts.
Traditional soaking methods are such a pain, but I found the blog, Paint The Kitchen Red and she has the best method for presoaking beans in the Instant Pot. It was a GAME CHANGER.
To presoak, all you need to do is rinse the beans, then place them in the Instant Pot and add enough water to cover them by 1 inch. I use a 6-quart pot, so 4 cups of water covers my beans nicely.
Turn your valve to “sealing” and set your Instant Pot to “manual” or “pressure cook”. Cook on high pressure, for 5 minutes. Once the beans have cooked for 5 minutes, allow them to naturally release for 15 minutes. Move the valve to “venting”, and allow the rest of the pressure to release. Once the pressure has released, drain the beans and they’re ready to use!
Chili Recipe (Instant Pot) FAQs
By not soaking the dry beans before cooking, the chili will just take a little longer to cook (35-40 minutes on high pressure) and it will also absorb more of the cooking liquid while simmering in the Instant Pot. The only problem with this is that the less liquid there is in the pot, the higher the chance for the “burn” error to come up.
I also found that when I didn’t soak the beans, my chili tasted very “beany”, and muted the tomato and spices. It was still delicious, but just not optimal.
If you want to make your chili without soaking the beans first, just follow the recipe as written, and add an extra cup of broth. Add your dry beans to the chili mix, and cook in the Instant Pot for 35 minutes on high pressure, with a natural release of 15 minutes. If the beans are still snappy, pop the lid back on, and cook on high pressure for another 5-10 minutes.
Because we’re using the Instant Pot, the dry beans do not need to be cooked before adding to the chili. With that being said, I very highly recommend presoaking the beans first (using the Instant Pot) to save time and to prevent the chili from becoming too dry and getting that awful burn error.
Soaking will also help make the beans more digestible, and help prevent bean blowouts.
After soaking, the dry beans will cook in the chili for 25 minutes (on high pressure) in the Instant Pot. The natural release for 15 minutes will finish the cooking process.
If you do not presoak the beans first, then it’ll take about 35-40 minutes to cook the beans at high pressure, and then a natural release of 15 minutes. You may need to add an extra cup of broth to prevent burning or drying out.
You can make your chili vegetarian easily! Just replace the ground beef with plant based crumbles or a pound of diced mushrooms. Mix up the varieties for extra depth of flavor! Also, make sure to use vegetable broth instead of chicken broth.
You can add extra veggies too like bell peppers, diced zucchini, and corn!
To keep the chili from burning in the Instant Pot, make sure there is enough liquid in the pot! Both the dry beans and the Instant Pot require a lot of liquid in order for this chili to cook properly–so don’t be shy on the broth and make sure to add the juice from the tomatoes into the pot!
Another way to prevent burning is to make sure you scrape up any bits off the bottom of the pot after sauteing the meat and onions. Adding the chicken broth will help loosen any stuck on pieces of meat, and a rubber spatula will help get up any other bits stuck to the bottom of the pot. This will add extra flavor to the chili while preventing burnage.

Serving Instant Pot Chili

Scoop generous portions of chili into bowls and top with shredded cheddar cheese, sour cream, and tortilla chips. Or a healthy chunk of sweet cornbread.
This chili is also delicious served over brown rice and topped with fresh avocado, green onions, and cilantro.
Storing Leftover Chili
Leftovers can be stored in an airtight container in the fridge for up to 5 days or in the freezer for months.
To reheat your leftover chili, scoop it into a microwave safe container and microwave until heated through.
You can also scoop portions back in the Instant Pot and reheat on “sauté” mode. I would select the “less” or “normal” temperature setting.
Add a cup of chicken broth to the chili mixture if it starts to look dry and cook until warmed through.
Other Recipes You Might Like:
Save This Recipe
Just enter your email below and we will send this recipe right to your inbox, plus we will send more yummy recipes and ideas.

Instant Pot Chili (Dry Beans)
Ingredients
- 16 oz dried black beans
- 4 cups of water
- 20-24 oz ground turkey lean ground beef, or plant based crumbles
- 2 tablespoons of olive oil
- 1 1/2 cups of sweet onion one medium, diced
- 2 cloves garlic minced
- 4 cups of low sodium chicken or beef broth
- 2 14.5 oz each cans of diced tomatoes, with juice
- 1 6oz can of tomato paste
- 1 tablespoon of diced chipotle in adobo sauce optional if you don’t want a spicy chili
Chili Seasoning
- 4 tablespoons chili powder
- 2 tablespoons ground cumin
- 1 tablespoon smoked paprika
- 1 tablespoon garlic powder
- 1 tablespoon ground coriander
- 2 teaspoons kosher salt
- 2 teaspoons granulated sugar
Instructions
- Presoak the beans:Add your dry beans to a colander and rinse clean. Pick out any funky looking beans or twigs that may have gotten in there.
- Next, add the cleaned beans to the Instant Pot. Add about 4 cups of water or enough water to cover the beans by an inch.
- Twist on the lid and turn the valve to “sealing”. Set the Instant Pot to “manual” or “pressure cook”.
- Cook on high pressure for 5 minutes. After cooking, allow the beans to release naturally for 15 minutes.
- After the natural release, turn the valve to “venting” and allow the rest of the pressure to release. Once the pin has dropped and the steam has stopped, carefully remove the lid and drain the beans. Discard the liquid.
- Making the Chili Seasoning:While the beans soak, prepare the chili seasoning.
- In a small dish, combine all of the spices, salt, and sugar and mix well. Set aside to add to the chili later.
- Making the Chili:After soaking the beans, clean out the pot and dry well.
- Return the insert back to the Instant Pot and add two tablespoons of olive oil.
- Set the Instant Pot to the “saute” function. I start on “more” but switch to “normal” or “less” to adjust the cooking temperature if needed.
- Next, add the ground turkey to the olive oil in the pot and saute until the meat is cooked through, about 7-8 minutes.
- Once the turkey is cooked, add the diced onion to the meat and cook until soft, about 4-5 minutes.
- After the onions have become soft and translucent, add the garlic and cook for 1 minute until fragrant.
- Pour in the chicken or beef broth.
- Using a rubber spatula, scrape up any bits of meat and onion that may have stuck to the bottom of the pot.
- Add the drained beans, diced tomatoes, tomato paste, chipotle in adobo, and the chili seasoning, to the pot.
- Stir the mixture together until combined. In a 6qt Instant Pot, this should take you a little over the 1/2 line. Press “cancel” to end the saute function.
- Twist the lid on the pot and turn the valve to “sealing”.
- Set your Instant Pot to “manual” or “pressure cook” and cook on high pressure for 25 minutes. Once the cooking is done, do a natural release for 15 minutes. After the natural release, switch the valve to “venting” and allow the rest of the pressure to release. Once the pin has dropped and the valve has stopped steaming, carefully remove the lid.
- Give the chili a stir and serve with your favorite chili toppings!


This worked SO WELL! I had dried black beans and about 4 pounds of ground beef and various flavors of sausage. I must admit I radically changed the saute steps and borrowed from my favorite jambalaya recipe: mirepoix/trinity mix (green bell pepper, garlic, onion, carrot, bay leaf and dry seasoning) sauteed in bacon fat, cooked down, tomato paste added and caramelize the tomato paste (you’ll need to add broth and deglaze as the fond starts to build), THEN add the meat. The par-cooked beans were the PERFECT texture. The pre-cooking the beans, plus the timing in your recipe, is 100% foolproof and made a most delicious pot of homemade chili, which we shall now enjoy with baked potato, and then again with white rice with sauteed peppers and onions. Yum!!!
I weep at the delicious chili that I have made. I weep having not know how amazing beans in the pressure cooker were before today. I added two minutes because we are at high altitude. They were so creamy and lovely and the flavors of this chili were fan-ding-dang-tastic. Thank you for the recipe. Have a lovely day, week, month.
I think this was going to be delicious but I cannot figure out why it’s soooo spicy. We eat all kinds of food and spice levels but this is so uncomfortable for chilli. I have tried diluting it with milk, cheese, chips. I cannot figure out what is wrong and I feel like I wasted so much food. 🥲
Oh dear!
I’m curious, what kind of chili powder did you use? I use a standard McCormick chili powder for this (which is really just a spice blend), and not a specific chile like ancho or chipotle.