Flaky All Butter Pie Crust

This post may contain affiliate links, see my disclosure policy for details.
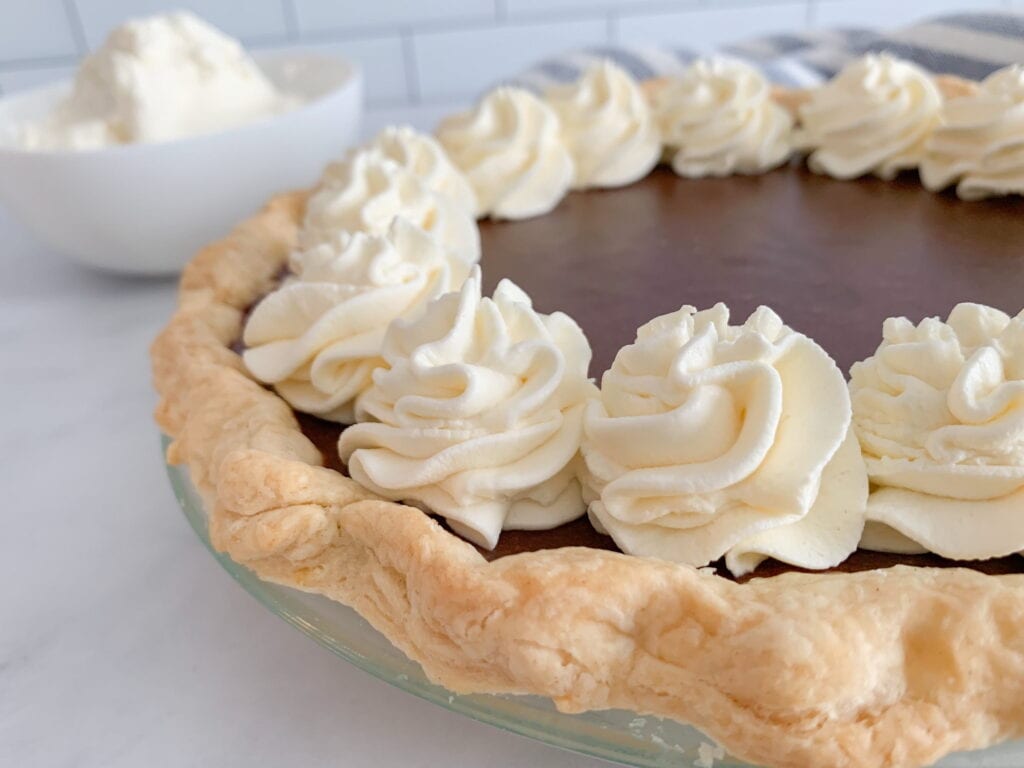
This flaky all butter pie crust is as delicious as it is easy to make! Made entirely in the food processor, this dough comes out flaky, tender, and perfect every time. This no fail buttery crust can even be made ahead and frozen for an easy holiday baking season!

This post may contain affiliate links. See my disclosure policy for details.
This flaky, all butter pie crust recipe is THE pie crust recipe in our family. And I don’t mean just me, Tim and D, I mean THE RECIPE back when my sister and I were kids.
It’s the kind of recipe that’s handwritten in chicken scratch on a stained piece of paper, tucked inside an ancient cookbook…
Yup that kind of recipe. So you know it’s gotta be good.
This is my dad’s pie crust recipe and it’s the pie crust recipe we make every Thanksgiving and every other occasion that demands a pie crust.
Now, his original recipe contained shortening, but we never had shortening around much, so the pie dough has been modified over the years to an all butter version–or in some cases an all margarine version.
But I’ll tell ya, this all butter pie crust is just as flaky, super tender, and melt in your mouth delicious as one with shortening.
I’m excited to share this recipe with you! You’re going to love it and I hope it sticks around in your family for decades just as it has with mine.
How To Make A Flaky All Butter Pie Crust From Scratch
Ingredients:
For a single 9″ pie shell:
- 1 1/2 cups all purpose flour
- 3/4 cup ( 1 1/2 sticks) of unsalted butter, very cold and cut into cubes
- 1/2 teaspoon salt
- 5 tablespoons of ice water
For a double crust 9″ pie:
- 3 cups all purpose flour
- 1 1/2 cups (3 sticks) of unsalted butter, very cold and cut into cubes
- 1 teaspoon of salt
- 8-9 tablespoons of ice water
INSTRUCTIONS:
TO MAKE A SINGLE PIE CRUST:
In the bowl of a food processor, add the flour and salt. Pulse a few times to combine.
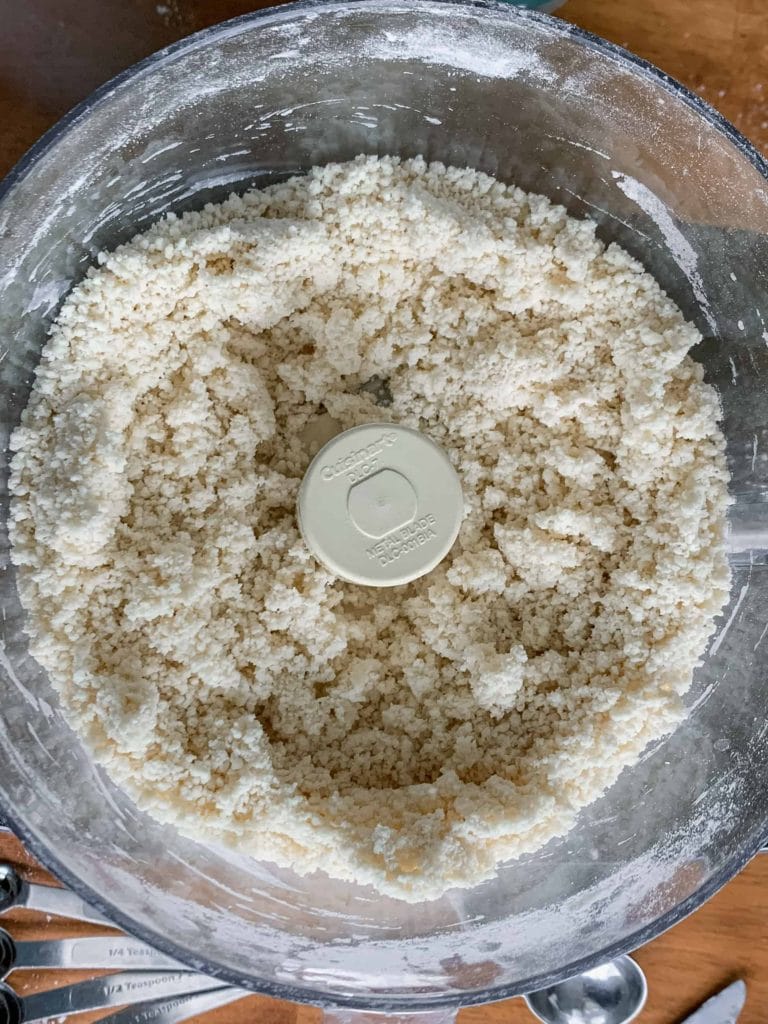
Add in cold, cubed butter and pulse until the mixture looks like coarse sand.

Alternatively, you can cut the butter into the flour with your fingertips or a pastry cutter if you don’t have a food processor. You’ll need to work quickly so the butter doesn’t melt.
Drizzle in the water and pulse until the mixture starts to form clumps.
Add more water a tablespoon at a time if the mixture looks too dry and won’t clump together when squeezed in your hand.
Once mixed, pour the pie dough onto a piece of plastic wrap.
Quickly and gently form into a ball and flatten into a disc. Do not work the dough too much, or the crust will be tough.
Wrap in the plastic and chill in the fridge for one hour.
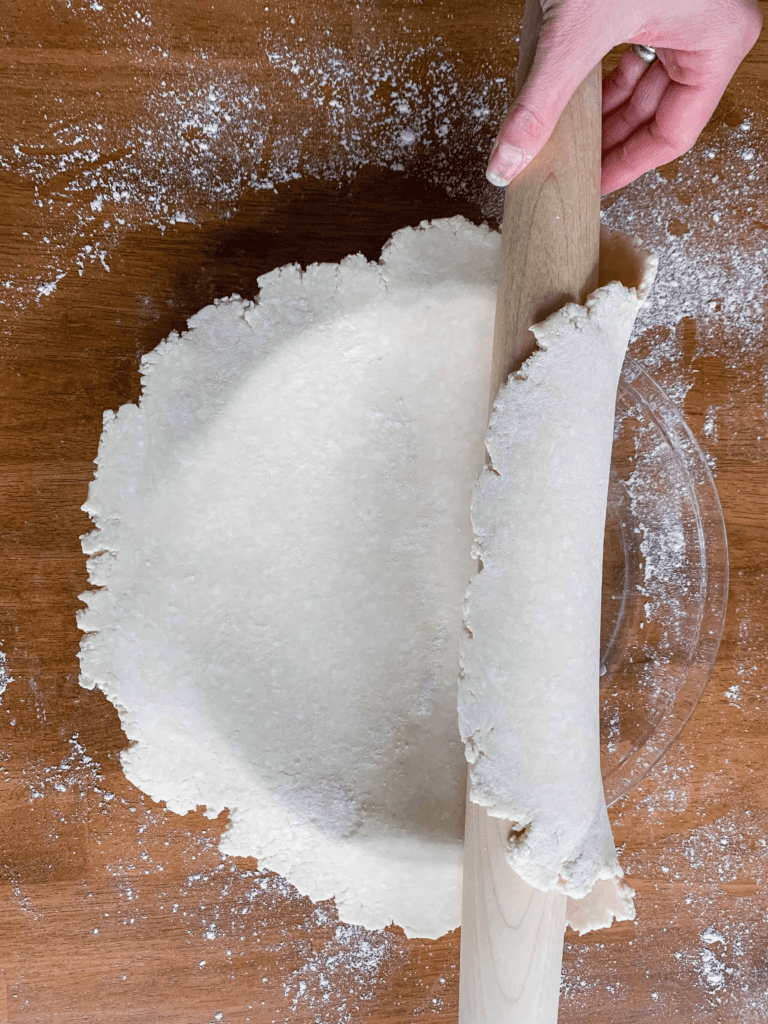
After chilling, lightly flour the table and roll the pie dough about 1/4″ thick and large enough to cover the 9″ pie plate.
Wrap the dough around your rolling pin and transport to an ungreased pie plate. Gently lift and press the dough into the pie plate.
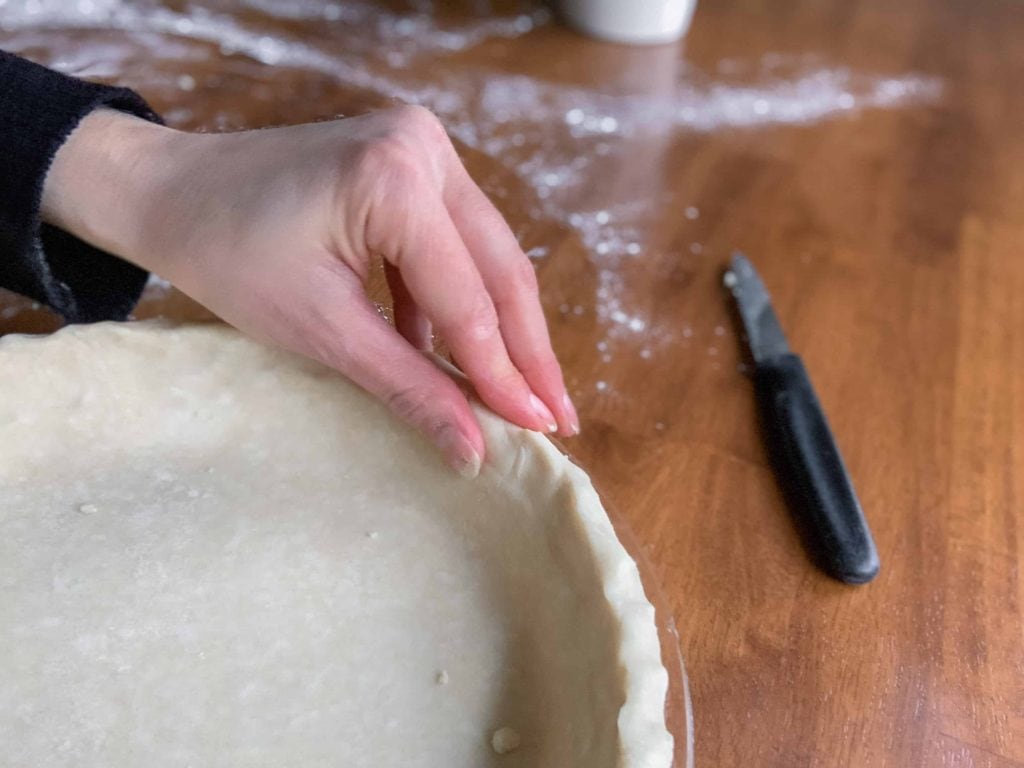
With a sharp knife or kitchen shears, trim off the excess dough overhang so that it’s flush with the outer edge of the pie plate.
Pinch the edges of the dough to create a nice edge and make sure to add your pie dough trimmings to fill in any thin spots.
You can flute the edge of the dough by using your knuckles to make a pretty decorative edge.
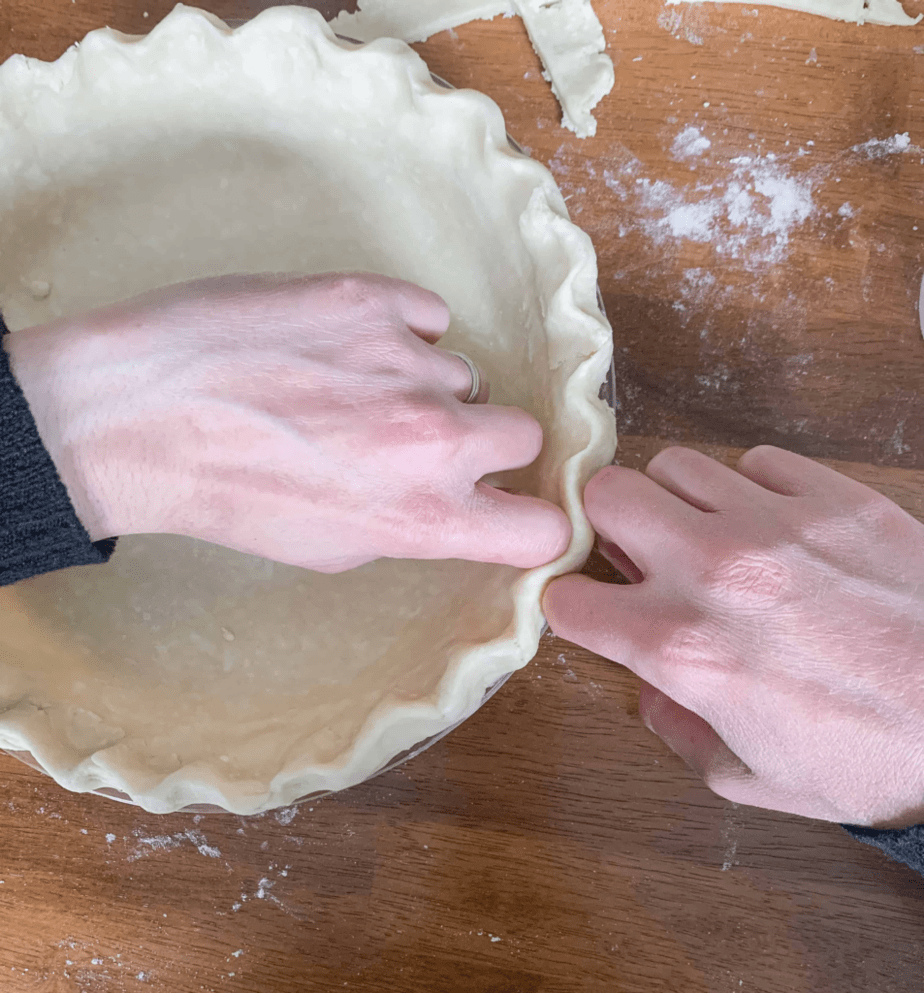
Stick the pie plate in the freezer for 30 minutes until firm, this will help keep the butter in the crust nice and cool and help the edges keep their shape.
After freezing, fill with your favorite filling and bake per your recipe’s instructions, or blind bake the crust (instructions below) and fill with a no bake pudding or cream.
TO MAKE A Double PIE CRUST
Combine the ingredients for the double pie crust using the same food processing method as above for the single crusted pie.
Once your dough has finished mixing in the food processor, lay out two sheets of plastic wrap, side by side, on your work table.
Divide the dough in half and place each half on a sheet of plastic wrap. Quickly and gently form into a round disc. Do not work the dough too much, or the crust will be tough.
Pop the discs in the fridge for an hour.
After your discs have chilled, lightly flour your work surface. Remove one disc from the fridge, unwrap it and place on your floured surface.
Roll the dough out to about 1/4″ thick and large enough to cover the 9″ pie plate.
Wrap the dough around your rolling pin and transport it to an ungreased pie plate. Gently lift and press the dough into the pie plate, do not trim the overhang at this point.
Pop the pie plate with the bottom crust back in the fridge and grab the other disc of dough.
Roll out until it’s about 1/4″ thick and set aside.
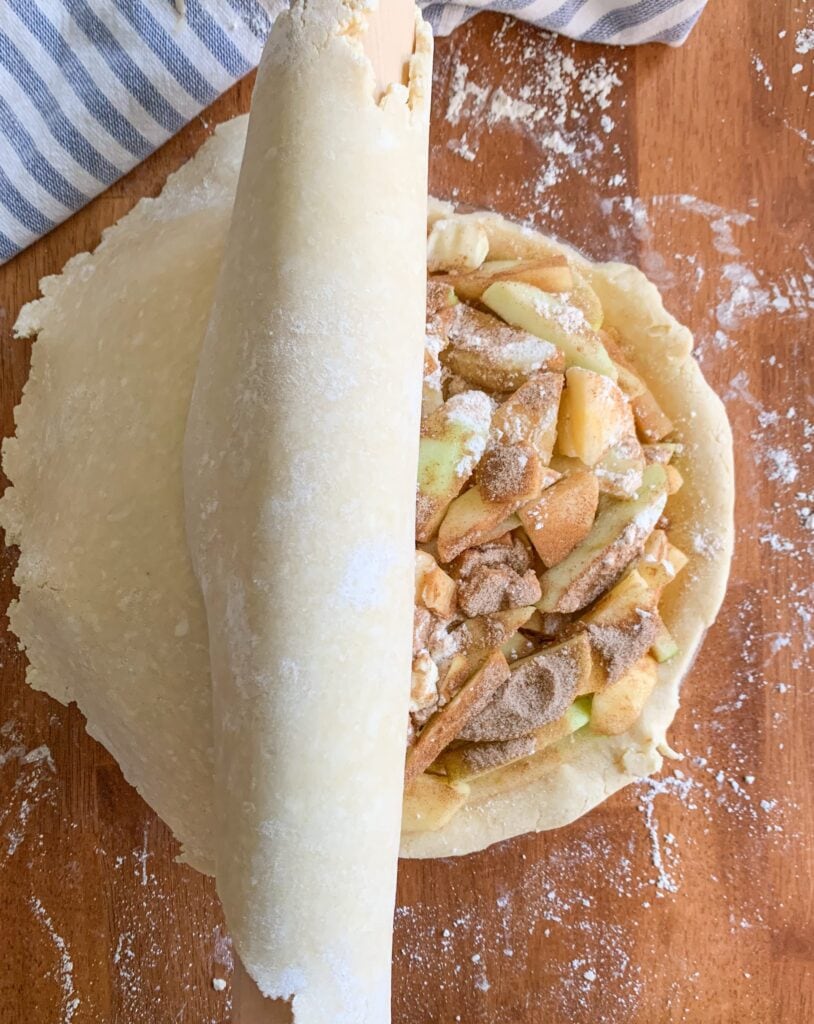
Remove the bottom crust from the fridge and fill with your desired filling (apple, peach, blueberry, chicken pot pie filling, etc…).
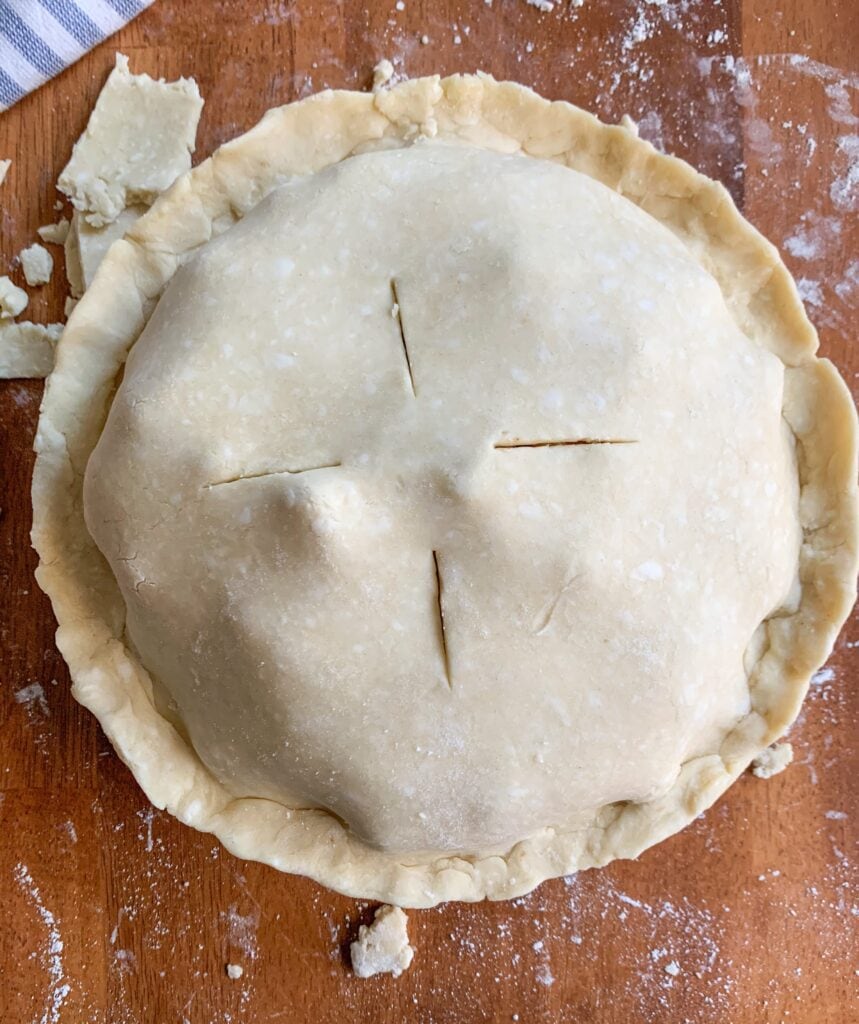
To put the two pie crusts together, grab your rolled out top crust and place it on top of the the bottom crust and filling.
Trim off the excess top and bottom overhang around the outer edge of the pie plate.
Pinch and crimp the outer edges of the dough together to seal. Use your extra pie dough trimmings to fill in any thin spots.
You can flute the dough by using your knuckles to make a pretty decorative edge.
Slice some holes in the top crust for ventilation. If the dough feels like it’s getting too soft, allow the pie to chill in the fridge for 30 minutes to firm up.
Once chilled, remove pie from the fridge and proceed with your recipe’s baking instructions.
Blind Baking A Crust:
What is Blind Baking Pie Crust?
Blind baking means that you are baking your pie shell all the way through, without filling it first.
Blind baking is necessary for pies with no bake fillings– like a chocolate cream pie or a banana cream pie.
How to Blind Bake a Pie crust
What you’ll need:
- Single 9″ Pie Dough prepared, chilled, pressed into the pie plate
- 32 oz of dried beans (any kind) or pie weights
- Foil And Cooking Spray
Preheat oven to 425°.
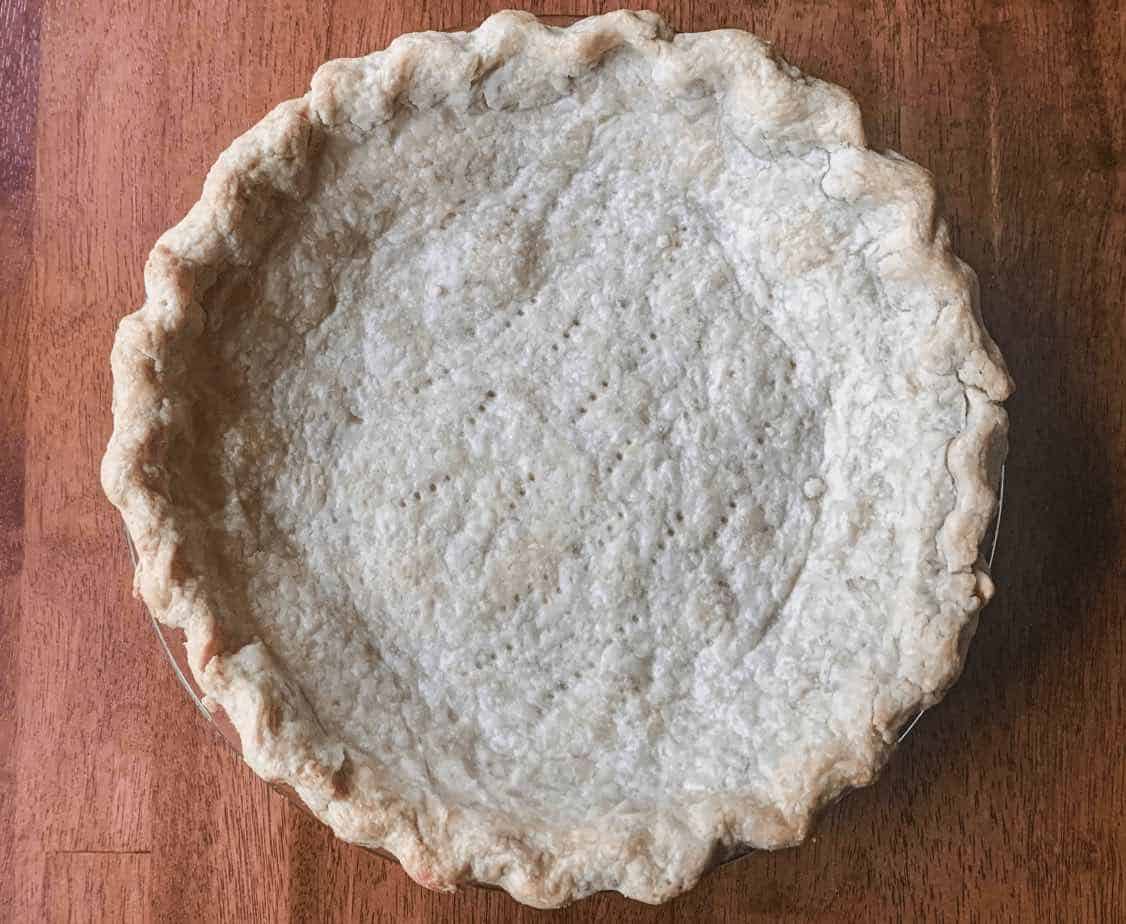
Dock (poke) the bottom of the crust with a fork, making sure to get the bottom inside edges too. This prevents the crust from puffing as it bakes.
Place your pie shell in the freezer for 30 minutes until firm.
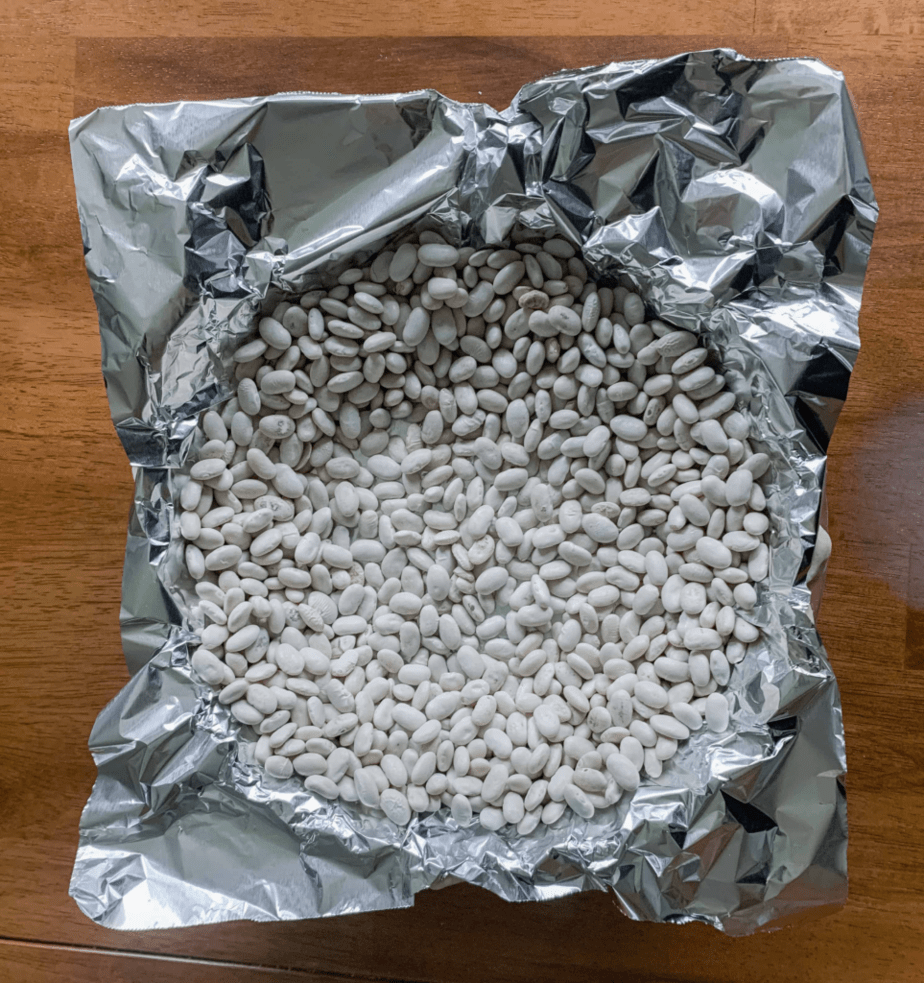
Once crust is very firm, spray a piece of foil with cooking spray and line the inside of the pie crust with it (greased side down). Make sure the piece of foil is large enough to hang loosely over the edges of the crust too. That way they won’t burn.
Pour your beans or pie weights into the foil lined crust.
Bake at 425° for 20 minutes. The edges should just be starting to brown.
Take crust out of the oven and carefully remove the beans/weights and foil.
Put your crust back in the oven.
Turn the oven down to 350° and bake for 15-20 minutes longer, until the crust is dry and golden brown.
Remove from the oven and let cool before filling.
Which is better for baking, butter or shortening?
I think this is a matter of personal opinion, but when it comes to making pie crust, I’m team butter on this one.
While shortening makes for a nice flaky crust, it’s kinda flavorless. So while it’s perfect for texture, it’s not my top choice for taste.
Butter on the other hand is very flavorful and tastes delicious in a pie crust! Butter is a little trickier to work with than shortening, but I find that an all butter crust can be just as flaky and tender as a shortening crust and have a lot more flavor!
How long can you keep homemade pie crust in the refrigerator?

You can keep an all butter pie dough in the fridge wrapped tightly in plastic wrap for up to two days.
When you’re ready to use, remove from the fridge, and roll out. If the dough is too firm to roll, let it sit on the counter for a couple of minutes to soften. But don’t let it get too warm! The butter in the dough needs to stay nice and cold to make a flaky crust.
Can I freeze pie crust?
Yes! There are two ways you can freeze pie dough:
The first way is to mix the dough per the recipe above, but after forming the dough into a disc, wrap it very tightly in plastic wrap and then aluminum foil and pop it in the freezer. You can freeze the dough for months.
When you want to make your pie, remove the pie disc from the freezer and allow it to thaw in the fridge overnight before rolling out.
The second way you can freeze your pie dough is by preparing the ingredients as instructed in the recipe, rolling out the dough, and lining the pie plate. But instead of baking the pie shell, you’ll pop it in the freezer, pie plate and all, until firm.
Once firm, you can wrap the pie shell tightly in plastic wrap and aluminum foil and store it in the freezer for months.
When you’re ready to bake, do not thaw. You do not need to thaw your pie shell before filling and baking.
You can just fill the frozen crust with your desired filling and bake per your recipe or blind bake without filling (see above for blind baking instructions).
On a side note, King Arthur has a fantastic article about freezing whole pies. I made a batch of chicken pot pies using this Flaky All Butter Pie Crust recipe and King Arthur’s freezing instructions and it worked perfectly! The pot pies baked beautifully and tasted amazing! Here’s the link.
Tips For making a flaky all butter pie crust:
- Make sure to use cold butter. Keep the butter as cold as possible. Even frozen butter is great if you’re using a food processor to mix the dough. If the butter gets too warm, it won’t release steam while baking and won’t create those lovely flaky layers that make the crust so tender. The result instead will be a melted, heavy, greasy crust.
- Do not overmix the dough. Over mixing will activate the gluten in the flour, making the dough tough and you’ll end up with more of a dense cracker than a flaky, tender, crust.
- Use as little flour as possible when rolling. Using too much flour will make the dough really dry and dense and you’ll lose that tender texture.
- Keep the dough cold. Not only do you want to keep your butter cold, but you want your dough to be well chilled too. If the dough gets too warm, it will melt in the oven and lose it’s pretty shape around the edge. If the dough feels like it’s getting too soft or too warm, pop it back in the fridge or freezer for 20-30 minutes to firm up.
Other Recipes You Might Like:
Save This Recipe
Just enter your email below and we will send this recipe right to your inbox, plus we will send more yummy recipes and ideas.

Flaky All Butter Pie Crust
Ingredients
Single 9″ Pie Crust
- 1 1/2 cups all purpose flour
- 3/4 cup (1 1/2 sticks) of unsalted butter, very cold and cut into cubes
- 1/2 teaspoon salt
- 5 tablespoons of ice water
For A Double 9″ Pie Crust
- 3 cups all purpose flour
- 1 1/2 cups (3 sticks) of unsalted butter , very cold and cut into cubes
- 1 teaspoon of salt
- 8-9 tablespoons of ice water
Instructions
- To make a single 9″ Pie CrustIn the bowl of a food processor, add the flour and salt. Pulse a few times to combine.
- Add in cold, cubed butter and pulse until the mixture looks like coarse sand.
- Alternatively, you can cut the butter into the flour with your fingertips or a pastry cutter if you don't have a food processor. You'll need to work quickly so the butter doesn't melt.
- Drizzle in the water and pulse until the mixture starts to form clumps.
- Add more water a tablespoon at a time if the mixture looks too dry and won't clump together when squeezed in your hand.
- Once mixed, pour the pie dough onto a piece of plastic wrap.
- Quickly and gently form into a ball and flatten into a disc. Do not work the dough too much, or the crust will be tough.
- Wrap in the plastic and chill in the fridge for one hour.
- After chilling, lightly flour the table and roll the pie dough about 1/4″ thick and large enough to cover the 9″ pie plate.
- Wrap the dough around your rolling pin and transport to an ungreased pie plate. Gently lift and press the dough into the pie plate.
- With a sharp knife or kitchen shears, trim off the excess dough overhang so that it's flush with the outer edge of the pie plate.
- Pinch the edges of the dough to create a nice edge and make sure to add your pie dough trimmings to fill in any thin spots.
- You can flute the edge of the dough by using your knuckles to make a pretty decorative edge.
- Stick the pie plate in the freezer for 30 minutes until firm, this will help keep the butter in the crust nice and cool and help the edges keep their shape.
- After freezing, fill with your favorite filling and bake per your recipe's instructions, or blind bake the crust (instructions below) and fill with a no bake pudding or cream.
- To Make a Double 9″ Pie CrustIn the bowl of a food processor, add the flour and salt. Pulse a few times to combine.
- Add in cold, cubed butter and pulse until the mixture looks like coarse sand.
- Drizzle in the water and pulse until the mixture starts to form clumps.
- Add more water a tablespoon at a time if the mixture looks too dry and won't clump together when squeezed in your hand.
- Have two sheets of plastic wrap ready. Divide the dough in half and place each half on a sheet of plastic wrap.
- Quickly and gently form into a round disc. Do not work the dough too much, or the crust will be tough.
- Pop the two discs in the fridge for an hour.
- After your discs have chilled, lightly flour your work surface. Remove one disc from the fridge, unwrap it, and place it on your floured surface.
- Roll the dough out to about 1/4″ thick and large enough to cover the 9″ pie plate.
- Wrap the dough around your rolling pin and transport it to an ungreased pie plate. Gently lift and press the dough into the pie plate, do not trim the overhang at this point.
- Pop the pie plate with the bottom crust back in the fridge and grab the other disc of dough.
- Roll out until it's about 1/4″ thick and set aside.
- Remove the bottom crust from the fridge and fill with your desired filling (apple, peach, blueberry, chicken pot pie filling, etc…).
- To put the two pie crusts together, grab your rolled out top crust and place it on top of the bottom crust and filling.
- Trim off the excess top and bottom overhang around the outer edge of the pie plate.
- Pinch and crimp the outer edges of the dough together to seal. Use your extra pie dough trimmings to fill in any thin spots.
- Slice some holes in the top crust for ventilation. If the dough feels like it's getting too soft, allow the pie to chill in the fridge or freezer for 30 minutes to firm up.
- Once chilled, remove the pie from the fridge and proceed with your recipe's baking instructions.


First off, that is absolutely beautiful! Second, I’m going to have to try this!
You are so sweet thank you! It’s soooo good and it works every time! I hope you love it!
I love using butter in our crusts. This recipe looks great!
Butter really is the best!!! Thank you!
I’ll admit that I didn’t know it was so easy to make your own pie crust. Will be trying this recipe out this weekend for my Grandmother’s pumpkin pie recipe!
Thank you for posting an all butter recipe! My current recipe uses shortening and I really don’t like to use shortening. I am definitely going to give your recipe a try!! Looks fantastic. ❤️