How to Make Pizza Dough at Home
This post may contain affiliate links, see my disclosure policy for details.
If making your own pizza dough feels intimidating, you’re not alone—but this recipe for Homemade Pizza Dough will change that. I’ve designed this dough to be simple, successful, and freezer-friendly. I provide step-by-step instructions and lots of helpful tips so that the results are consistent and perfect every time. The process is simple, and best of all—you’ll feel proud you made it from scratch.

Why You’ll Love This Recipe for Pizza Dough
- The ingredients are simple and easy to find—nothing fancy or fussy here. Just real, basic pantry staples.
- This recipe is ready on YOUR schedule, and makes enough for two pizzas. Use the dough right after it rises or let it hang out overnight in the fridge. You can even freeze it for another day.
- Making pizza dough is surprisingly fun—and if you’ve got kids, get them involved! They’ll love rolling out dough, punching it down, and building their own little pizzas.
- This dough can be used for a million different pizzas. Use it for breadsticks, cookie sheet pizza, grilled pizzas, calzones, or toss it on a pizza stone if you’ve got one.
Homemade Pizza Dough Recipe Ingredients
This recipe makes enough dough for two 14″ pizzas or two 13×9″ sheet pan pizzas.

- Bread flour– This is my favorite flour to use for pizza dough. I give an explanation and alternatives below. Bread flour is super easy to find in the baking aisle at the grocery store!
- Instant yeast– I like using “bread machine” or “instant yeast”. This is NOT the same as active dry yeast. Instant yeast can go right in with the flour and other ingredients-no blooming needed. If you only have active dry yeast, that’s totally fine! Just bloom it first in the warm water for 5 minutes.
- Warm water– I use warm water right from the tap! Make sure to keep the temperature under 110ºF; hot water can hurt the yeast.
- Coarse Kosher salt– if you only have table salt, reduce the amount called for in the recipe to 3/4 teaspon
- Olive oil– Avocado oil works too! This keeps the dough nice and moist on the inside and helps it brown nicely in the oven.
- Honey– Add a little bit of honey to feed the yeast and help it rise!
Best Flour for Pizza Dough
Bread flour is my top choice for yeast breads, pizza, or my favorite dinner roll recipe.
It has a higher protein content, which helps strengthen the dough as it rises and during kneading (that’s when gluten forms). And bread flour gives you a beautiful puffed crust, a light and fluffy interior, and a pleasant chew.
I highly recommend King Arthur’s Bread Flour—it has more gluten forming protein than other brands, and it makes a noticeable difference in the final baked product.
All-purpose flour: You can absolutely use all-purpose flour for this recipe—don’t worry, I’ve tested it with both bread flour and AP, and they both make great pizzas. The dough will be a little stickier since all-purpose flour doesn’t absorb as much liquid during mixing— you might need to add a few extra tablespoons of flour to get the dough workable.
All-purpose flour crusts won’t be quite as chewy either—they’ll have a little more crunch, but not in a bad way. AP flour is totally fine if you don’t have bread flour on hand or need to stretch what you’ve got.
How to Make Homemade Pizza Dough
Step 1:
Before starting, if you’re using active dry yeast, sprinkle the yeast into the warm water and bloom for five minutes until puffy and bubbly.
If you’re using instant or bread machine yeast, add the yeast right to the flour.

Combine all ingredients and bloomed yeast (if applicable) into the bowl of a stand mixer, fitted with the dough hook attachment.
Mix for one minute on medium low speed.
Step 2:
Turn the mixer up one notch to medium speed and knead for three minutes. Stop the mixer and check the dough. If it’s sticky, add a little more flour, one tablespoon at a time. The dough should be pulling away from the sides of the bowl cleanly. Continue mixing for 8 more minutes.

The dough is done kneading when you poke it with your finger and it springs back quickly. The best way to test for doneness is the windowpane method.

Break off a small chunk and stretch it between your fingers in front of a window. If light can pass through the dough without it breaking, your dough is done kneading.
If your dough is sticky and busts apart easily, keep kneading for 2-5 more minutes.
Step 3:

Scrape the dough out onto a very lightly floured surface and knead 2-3 times by hand into a smooth ball. The dough should feel very soft, but not sticky, and form into a ball easily.
Step 4:

Lightly grease a large bowl with olive oil (I just reuse the mixing bowl) and place your dough inside.

Place the dough in a warm spot to rise until til it has doubled in size, 1 to 1 1/2 hours.
Step 5:

Once the dough has risen, punch it down and turn it out onto a lightly floured surface.

Divide the dough into two 16 ounce portions and roll each portion into a ball. Let the dough rest for 20 minutes before stretching into your desired shape and baking.
Overnight Pizza Dough
Follow steps 1-3 above. After kneading, divide the dough in half and place each chunk of dough into a lightly greased container that is 2x the size of each piece of dough.
Cover and allow the dough to rise in the fridge overnight for preferably 8-12 hours, but no more than 24 hours. When you’re ready to use it, turn the dough out onto a lightly floured surface and form it into a ball. Let the chilled dough sit for 30 minutes before shaping.
How To Make Homemade Pizza
This recipe makes enough for two 16-ounce dough balls. Working with one at a time, stretch or roll into a 12″ circle or press into an oiled sheet pan. Repeat with the second dough ball.
Stretching and shaping tip: if the dough pulls back on you while you’re stretching, let it rest for 5 to 10 minutes and continue stretching.

For sheet pan pizzas: Press and stretch one 16-ounce portion of dough to fit an oiled 13×9″ baking dish. Once shaped, top the dough with sauce, cheese, and your favorite toppings (like pepperoni or fresh basil pesto) and bake at 450°F for 15-20 minutes until risen and the cheese has browned.
Baking on a pizza stone: Preheat the oven and pizza stone to 500ºF. On a lightly floured surface, stretch one 16-ounce dough ball into a 12–14″ thin crust. Sprinkle cornmeal or semolina on a pizza paddle and place the dough on top. Add sauce, cheese, and toppings. Give the pizza a gentle shimmy to ensure it’s not sticking, then slide it onto the hot stone. Bake for 10–15 minutes, until the crust is golden and the cheese is bubbly.
Expert Tips
- Knead the dough long enough. It’s a good thing if the dough is pulling back on you when you’re stretching it out. Underkneading the dough won’t give the crust the structure it needs and will cause it to collapse into a dense brick while baking. If you want to knead the dough by hand you can certainly do that on a lightly floured surface. Expect to knead the dough for about 15-20 minutes.
- Watch the dough, not the clock. The rising times I give in this recipe are guidelines, since temperatures, climates, and kitchens are all different. 1 hour to 1 1/2 hours is a good estimate for proofing, but once the dough has doubled in size, it’s done proofing.
- Avoid under or overproofing. Not letting the dough rise long enough will give you a dense, thick crust. But letting the dough rise for too long will result in a dough that’s hard to work with and flat.
- Dough consistency varies. The amount of flour you need can change with the weather and kitchen conditions. Some days the dough’s perfect as-is, other days—especially when it’s rainy or humid outside—you might need 3 to 4 extra tablespoons of flour. Feel the dough as you go, and add flour only if needed. It’s better to have a slightly sticky dough than a dry one!
Homemade Pizza Dough Recipe Variations
- Traditional pizza: stretch or roll the dough out to a 12″ circle and bake on a pizza stone or round cookie sheet. Perfect slices for holding with a thick, bubbly edge.
- Thin crust pizza: roll one portion of dough out to 14″ bake on a sheet pan or a large pizza stone. Thin, light and crisp.
- Deep dish or sheet pan pizza- press 16 ounces of dough into a generously oiled baking dish for a thick and fluffy crust with crispy edges.
- Flavored pizza crust: Add herbs, minced garlic, or flavored oil to the ingredients while mixing. Or brush the edges of the pizza crust with oil and herbs before baking.

Things to Make With Pizza Dough
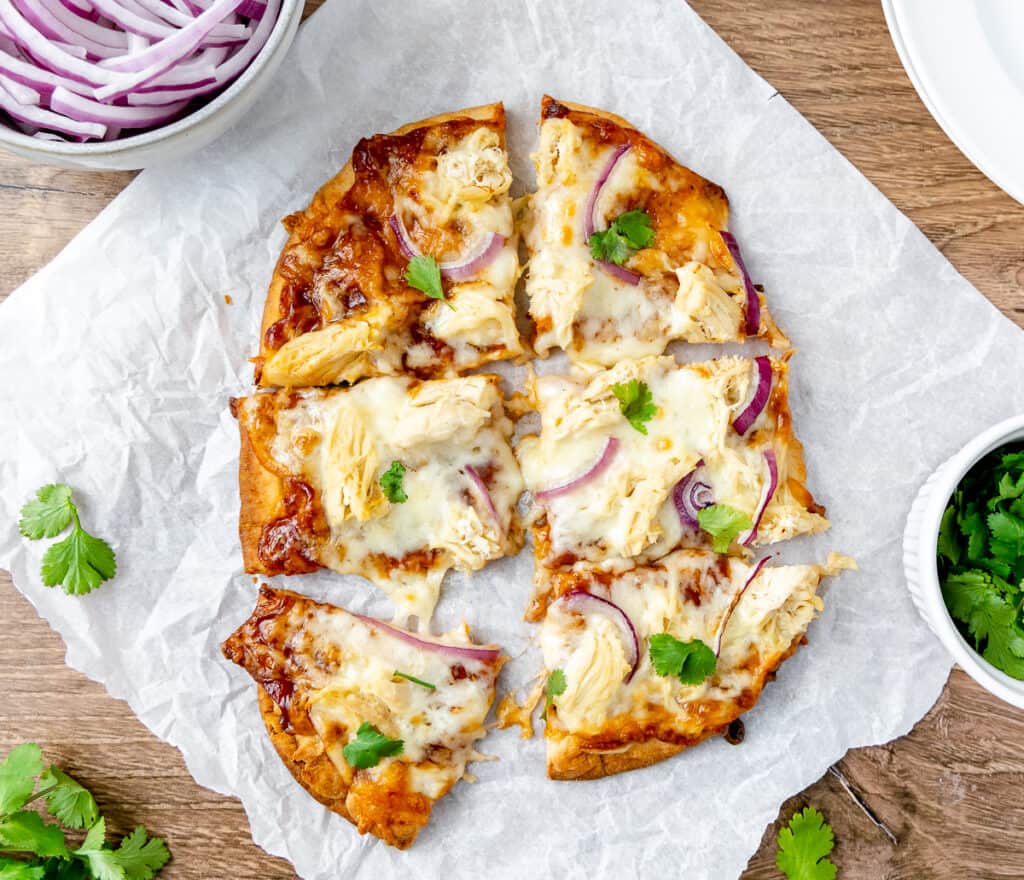
- Pizza, in every shape and size, I use this dough on my homemade sheet pan pizza and Hawaiian pizza.
- Stromboli
- Breadsticks
- Calzones
How to Store Pizza Dough
Unrisen pizza dough can sit in the fridge for as little as 5 hours, but no more than 24 hours. Store the dough in a container with a lid that’s at least twice the size of the dough to allow room for it to rise as it chills.
If you need to store pizza dough longer than 24 hours, I recommend freezing it. Freezing it will eliminate the risk of overproofing. The freezing instructions are below.
Can you freeze Pizza Dough?
Yes, I recommend freezing pizza dough if you need to store it longer than 24 hours or just want homemade dough on hand. Mix, knead, and let the dough rise per the recipe.
After rising, punch down the dough, turn it out onto a lightly floured surface, and divide it in half. Roll each piece of dough into a tight ball and wrap in a double layer of plastic wrap. Pop in the freezer and store for up to 3 months.
How to Thaw Frozen Pizza Dough
The night before you need your dough, remove it from the freezer and let it thaw overnight in the refrigerator.
Once thawed, remove the dough from the plastic wrap and turn out onto a lightly floured surface. Let the dough sit for 30 minutes before shaping and topping.
More Recipes You’ll Love


Save This Recipe
Just enter your email below and we will send this recipe right to your inbox, plus we will send more yummy recipes and ideas.

How to Make Homemade Pizza Dough
Ingredients
- 4 cups bread flour + 1/4 cup as needed
- 2 ¼ teaspoon (1 packet) instant bread machine yeast or active dry yeast (see instructions for prepping yeast)
- 1 ½ cups warm water (about 110°F)
- 1 ½ teaspoons coarse Kosher salt
- 2 tablespoons olive oil
- 1 teaspoon honey
Instructions
- Before starting, if you're using active dry yeast, sprinkle the yeast into the warm water and bloom for five minutes until puffy and bubbly. If you're using instant or bread machine yeast, skip blooming add the yeast right to the flour.
- Combine 4 cups of flour, yeast, water, olive oil, honey, and salt into the bowl of a stand mixer, fitted with the dough hook attachment.
- Mix for one minute on medium low speed until just combined, but the dough still looks shaggy.
- Turn the mixer up one notch to medium speed and knead for three minutes. Stop the mixer and touch the dough. If it sticks to your finger and won’t come off, add a little more flour from your 1/4 cup reserve. Only add one tablespoon at a time. Continue mixing for 8 more minutes. The dough should be pulling away from the sides of the bowl cleanly, if it’s not, add another tablespoon of flour and continue kneading.
- The dough is ready when it springs back quickly after a poke. For a better test, try the windowpane method: stretch a small piece between your fingers—if it’s thin enough for light to pass through without tearing, it’s done. If it tears easily, knead for 2–5 more minutes.
- After kneading, scrape the dough out onto a lightly floured surface and knead 2-3 times by hand into a smooth ball. The dough should feel very soft, but not sticky, and form into a ball easily.
- Lightly grease a large bowl with olive oil (I just reuse the mixing bowl) and place your dough inside. Cover with plastic wrap or a warm, damp, kitchen towel.
- Place the dough in a warm spot to rise until it has doubled in size, roughly 1 – 1 1/2 hours.
- Once the dough has risen punch it down and turn onto a lightly floured surface.
- Divide the dough into two 16 ounce portions and roll each portion into a ball. Let the dough rest for 20 minutes before stretching into your desired shape and baking.
Notes
- Stretching and shaping tip: if the dough pulls back on you while you’re stretching, let it rest for 5 to 10 minutes and continue stretching.
- For sheet pan pizzas: Press and stretch one 16-ounce portion of dough to fit an oiled 13×9″ baking dish. Once shaped, top the dough with sauce, cheese, and your favorite toppings (like pepperoni or fresh basil pesto) and bake at 450°F for 15-20 minutes until risen and the cheese has browned.
- Baking on a pizza stone: Preheat the oven and pizza stone to 500ºF. On a lightly floured surface, stretch one 16-ounce dough ball into a 12–14″ thin crust. Sprinkle cornmeal or semolina on a pizza paddle and place the dough on top. Add sauce, cheese, and toppings. Give the pizza a gentle shimmy to ensure it’s not sticking, then slide it onto the hot stone. Bake for 10–15 minutes, until the crust is golden and the cheese is bubbly.