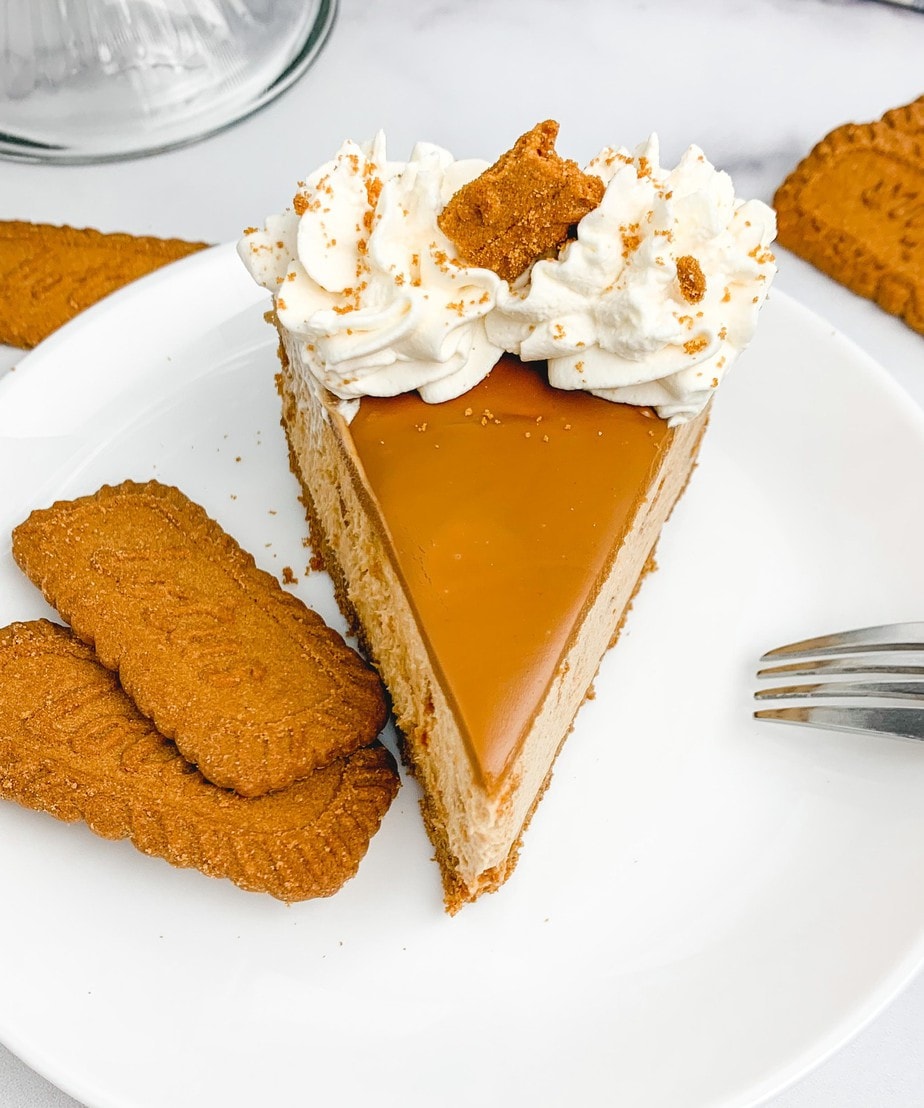
Lotus Biscoff Cheesecake-A No Bake Recipe
This post may contain affiliate links, see my disclosure policy for details.
Cookie Butter and Biscoff Cookies team up with sweet cheesecake filling to create the most delicious no bake dessert you’ll ever eat. Full to the brim with Biscoff Cookies, this cheesecake recipe packs a ton of flavor into every slice.
Hi friends–today I bring you one of my absolute favorite cheesecake recipes, Lotus Biscoff Cheesecake.
It’s a no bake wonder that is positively stunning and brimming with that signature Biscoff cookie flavor.
I’m serious when I tell you this recipe needs two packs of cookies and an entire jar of Biscoff cookie butter. This is not a drill people. This is Biscoff cookie to the max and you absolutely deserve it.
Let’s get in to it.
What are Biscoff Cookies?
Lotus Biscoff cookies are sweet and very crispy-crunchy cookies from Belgium. Per the ingredient list, they’re only flavored with cinnamon and brown sugar syrup. Those ingredients are what gives the cookies their very distinct, deep, caramelized taste.
While I wouldn’t call these cookies cinnamon flavored, I would say these definitely taste like a mild, toasted, spice cookie.
As for the Biscoff Cookie Butter, that’s actually a spread made from finely ground Lotus Biscoff Cookies with some additional sugar and canola oil added to make it spreadable. The flavor is way more concentrated than the cookies and it’s fabulous.
How to make a no bake Lotus Biscoff Cheesecake
Makes 1 8″or 9″ cake

Ingredients:
- 2 packages of Lotus Biscoff Cookies (8.8 oz each)
- 5 tablespoons of unsalted butter, melted
- A dash of kosher salt
- 1 cup of heavy whipping cream, plus additional for garnish
- 16 oz (2 packages) of cream cheese, room temperature
- 1 jar (14.1oz) of Biscoff Cookie Butter
- 2/3 cups of granulated sugar
- 1/2 teaspoon of vanilla extract
- Whipped cream for garnish (2 cups at least)
Instructions:
To Make The Biscoff Cheesecake Crust:
Spray an 8″ or 9″ springform pan with cooking spray and line the bottom of the cake pan with a circle of parchment paper. Spray the parchment circle with cooking spray as well.
In the bowl of a food processor, add an entire 8.8 oz package of Lotus Biscoff Cookies (32 cookies) and a dash of salt.
Pulse cookies until coarsely ground.
Add in melted butter and continue pulsing until the crumbs are all finely ground and evenly moistened.
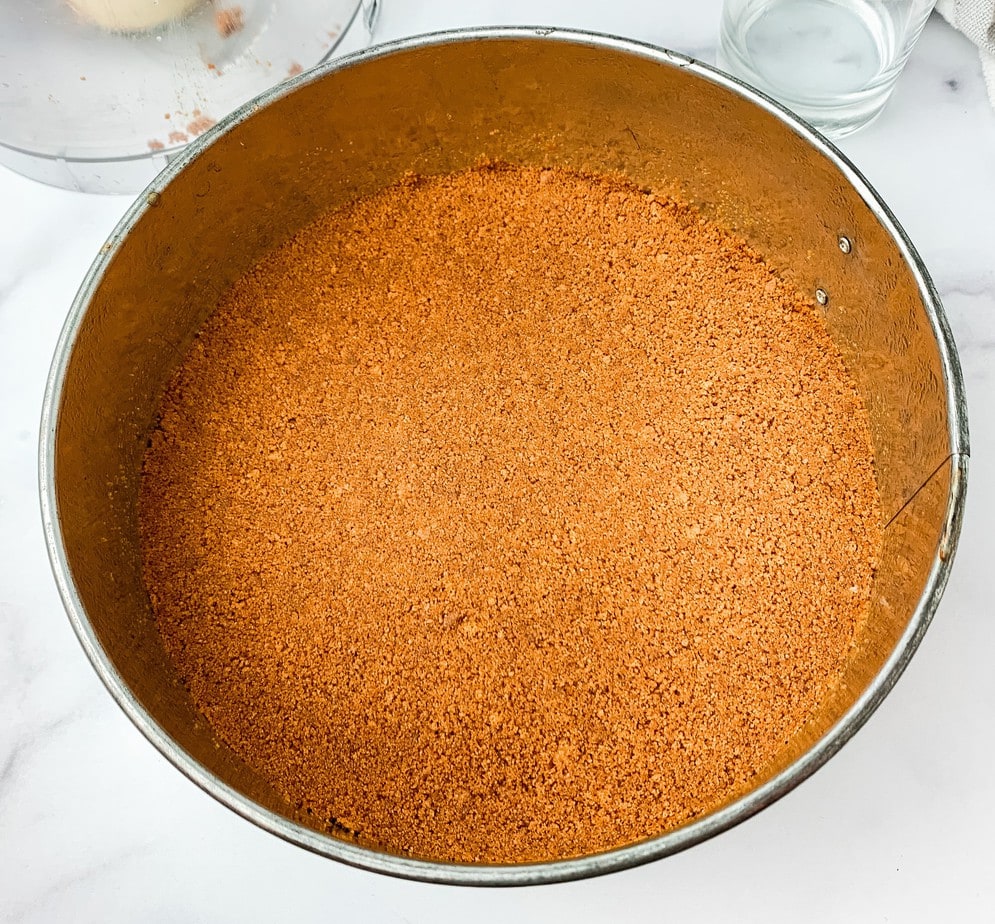
Dump cookie crumbs into the prepared pan. Use the bottom of a clean drinking glass to pack the crumbs down evenly and tight into the pan.
Pop the crust into the freezer while you prepare the filling.
To Make The Filling:
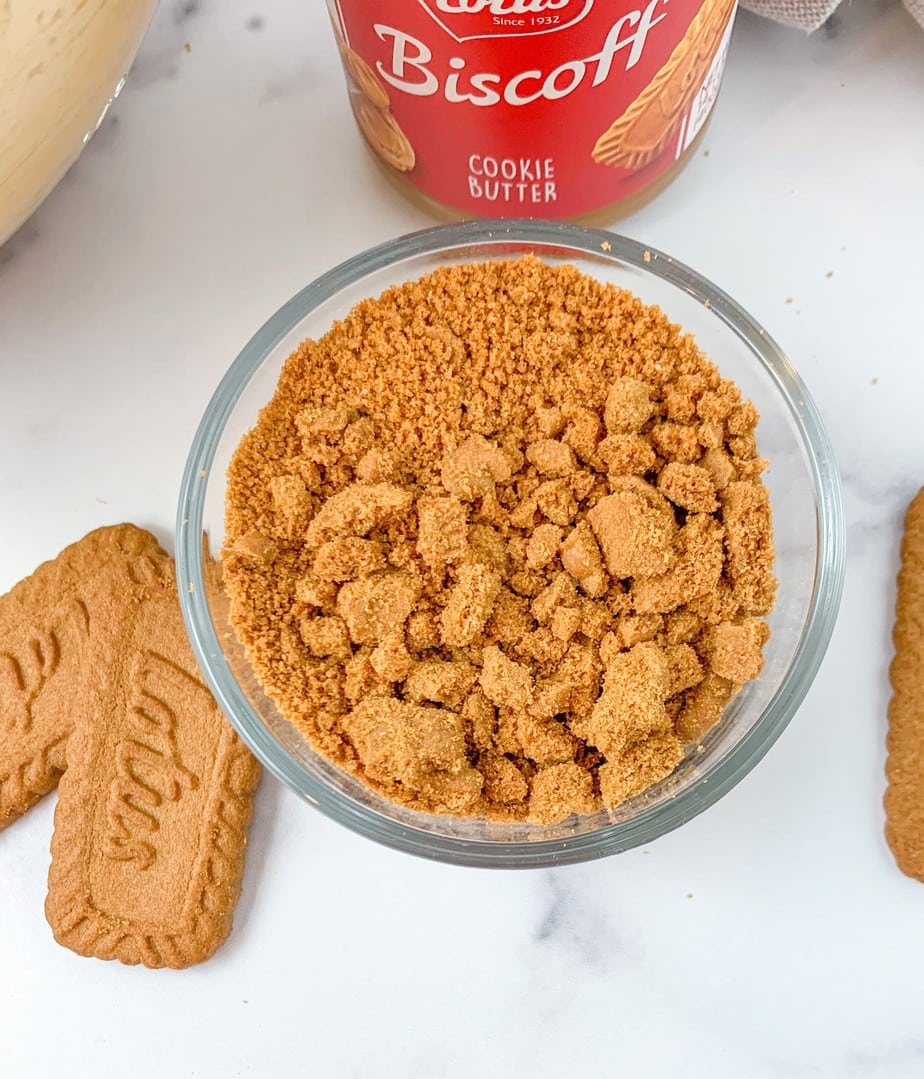
Remove 12 cookies from the second package of Biscoff Cookies and crush them into pea sized chunks. You should have about a cup. Set aside.
Pour 1 cup of cold heavy whipping cream into the bowl of a stand mixer.
Using the whisk attachment, whip the cream until it is thick and fluffy and has reached stiff peaks.

Gently scoop the whipped cream into another bowl.
Do not wash out the stand mixer bowl or the whisk attachment.
Return the now empty bowl and whisk back to the mixer and add the cream cheese. Whip until smooth.
Add 1 cup of Biscoff Cookie Butter to the cream cheese and mix until well blended. Do not eat or discard the rest of the cookie butter in the jar, we’ll need that for later!
Give the sides and bottom of the bowl a good scrape with a rubber spatula.
Add in the sugar and vanilla and mix until smooth.
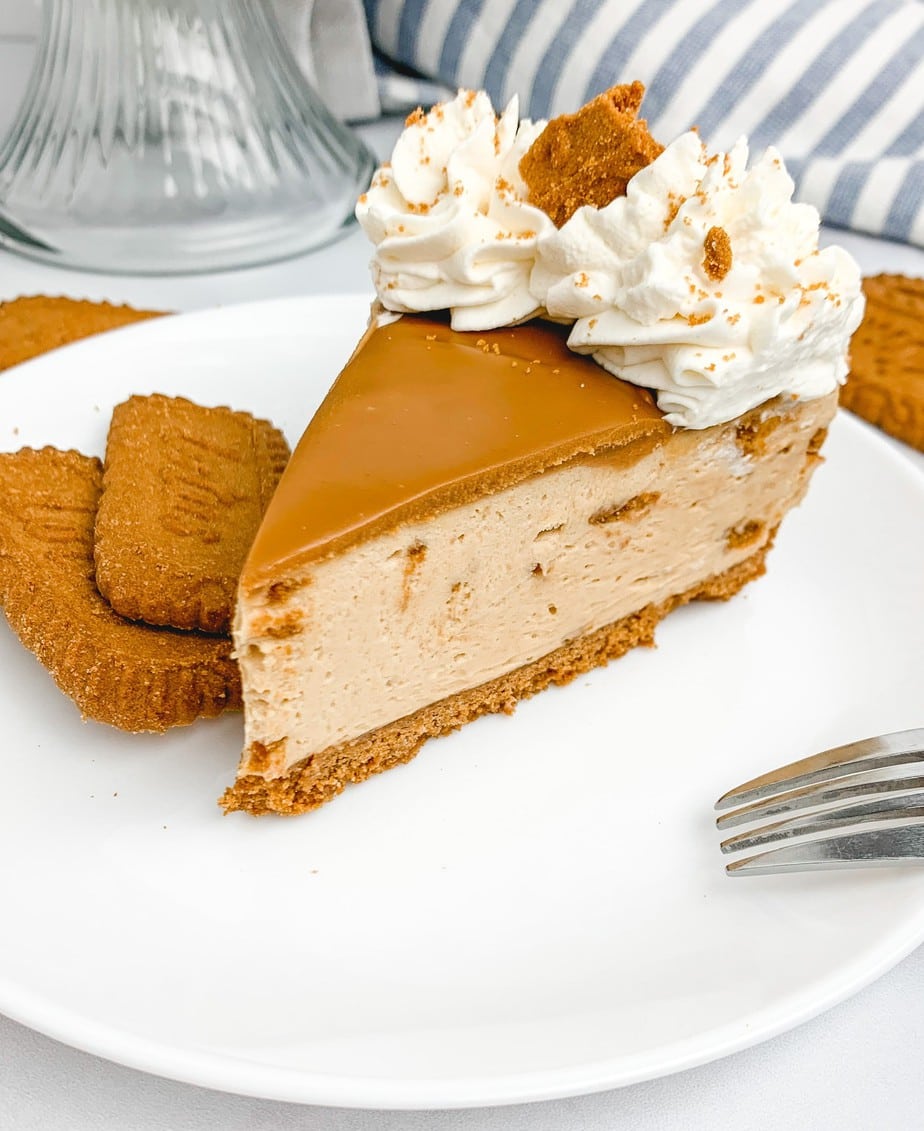
Remove the bowl from the mixer and dump in the reserved cookie chunks.
Using a rubber spatula, stir the cookie pieces into the batter by hand until evenly distributed. Make sure you’re mixing in everything off the sides and bottom of the bowl too.
Next, grab the whipped cream we made earlier, and gently fold the cream into the cream cheese and cookie butter mixture.
Make sure not to stir. Stirring would deflate all the air we whipped into the cream and the mixture wouldn’t be fluffy.
Continue folding until no more streaks of white cream are showing and the batter’s color has lightened and become fluffy.

Grab your cheesecake crust from the freezer and very gently spoon the cheesecake filling over the crust. Make sure to push the batter out to the sides of the pan and smooth out the top.
Pop the cake in the fridge and chill overnight.
Unmolding and Decorating The Lotus Biscoff Cheesecake
About 1 hour before serving, remove the cheesecake from the fridge and move it to the freezer. Freeze for about 15-20 minutes until the top of the cake is firm to the touch.
While your cake is in the freezer, scrape out the last of the cookie butter from the jar–you should have about 1/4 cup-into a heatproof or microwave safe bowl.
Microwave the Biscoff Cookie Butter for 30 seconds until the cookie butter is just melted. We do not want it very hot.
Remove the cake from the freezer and pour the melted cookie butter onto the center of the cake. Spread the cookie butter out towards the edge, but leave about a 1″ ring of exposed cake showing.
There won’t be enough Cookie Butter to cover the entire top of the cake but that’s ok–we’ll cover up the exposed parts with whipped cream.
To release the cake from the pan, run a thin, sharp knife around the edge between the cake and the pan to loosen. Make sure to get all the way down to the crust.
Gently release the sides of the springform pan and remove.
If you see any air pockets showing or uneven bits, you can use a butter knife to smooth out the sides and edges of the cake.
Once the cake has been umolded, you can finish decorating the top.
What I like to do is put whipped cream into a piping bag with a star tip and pipe on little cream rosettes to cover the exposed top of the cake.

Sprinkle the whipped cream with additional crushed Lotus Biscoff cookies and chill until the cookie butter is set.
Slice, serve, and enjoy!
How Long will my Biscoff Cheesecake last?
If there are any leftovers, your Biscoff cheesecake will last in the fridge for up to five days!
Honestly the longer it sits, the better it tastes!
Keep the cake covered as best you can and gently press a piece of plastic wrap up against any exposed cut sides.
Can I freeze this cheesecake?
Yes!
To freeze, make the cake as stated in the recipe. You can follow all the instructions up until the decorating with whipped cream stage. Make sure to let the cake set up completely before freezing.
Once the cake has set, you can either cut it into slices and store the slices in freezer-safe containers, or you can wrap the entire cake and springform pan in plastic wrap and foil and pop it in the freezer.
The night before you’re ready to serve, remove the cheesecake from the freezer and let it thaw out in the fridge overnight.
Once thawed, you can serve slices immediately, or if you froze the cake whole, you’ll need to pop it out of the springform pan.
To do this, run a thin, sharp knife around the edge between the cake and the pan to loosen. Make sure to get all the way down to the crust.
Gently release the sides of the springform pan and remove.
At this point, you can finish decorating the top of the cake with whipped cream, slice, and serve.
Other Recipes You Might Like:
No Bake Blueberry Lemon Cheesecake
Save This Recipe
Just enter your email below and we will send this recipe right to your inbox, plus we will send more yummy recipes and ideas.

Lotus Biscoff Cheesecake Recipe
Ingredients
- 2 packages of Lotus Biscoff Cookies 8.8oz each
- 5 tablespoons of unsalted butter melted
- A dash of salt
- 1 cup of heavy whipping cream cold
- 16 oz 2 packages of cream cheese, room temperature
- 1 jar 14.1oz of Biscoff Cookie Butter
- 2/3 cups of granulated sugar
- 1/2 teaspoon of vanilla extract
- Prepared whipped cream for garnish 2 cups at least
Instructions
- Prepare The Crust:Spray an 8″ or 9″ springform pan with cooking spray and line the bottom of the cake pan with a circle of parchment paper. Spray the parchment circle with cooking spray as well.
- In the bowl of a food processor, add an entire 8.8 oz package of Lotus Biscoff Cookies (32 cookies) and a dash of salt.
- Pulse cookies until coarsely ground.
- Add in melted butter and continue pulsing until the crumbs are all finely ground and evenly moistened.
- Dump cookie crumbs into the prepared pan. Use the bottom of a clean drinking glass to pack the crumbs down evenly and tight into the pan.
- Pop the crust into the freezer while you prepare the filling.
- To Make The Filling:Remove 12 cookies from the second package of Biscoff Cookies and crush them into pea sized chunks. You should have about a cup. Set aside.
- Pour 1 cup of cold heavy whipping cream into the bowl of a stand mixer.
- Using the whisk attachment, whip the cream until it is thick and fluffy and has reached stiff peaks.
- Gently scoop the whipped cream into another bowl.
- Do not wash out the stand mixer bowl or the whisk attachment.
- Return the now empty bowl and whisk back to the mixer and add the cream cheese. Whip until smooth.
- Add 1 cup of Biscoff Cookie Butter to the cream cheese and mix until well blended. Do not eat or discard the rest of the cookie butter in the jar, we’ll need that for later!
- Give the sides and bottom of the bowl a good scrape with a rubber spatula.
- Add in the sugar and vanilla and mix until smooth.
- Remove the bowl from the mixer and dump in the reserved cookie chunks.
- Using a rubber spatula, stir the cookie pieces into the batter by hand until evenly distributed. Make sure you’re mixing in everything off the sides and bottom of the bowl too.
- Next, grab the whipped cream we made earlier and gently fold the cream into the cream cheese and cookie butter mixture.
- Make sure not to stir. Stirring would deflate all the air we whipped into the cream and the mixture wouldn’t be fluffy.
- Continue folding until no more streaks of white cream are showing and the batter’s color has lightened and become fluffy.
- Grab your cheesecake crust from the freezer and very gently spoon the cheesecake filling over the crust. Make sure to push the batter out to the sides of the pan and smooth out the top.
- Pop the cake in the fridge and chill overnight.
- Unmolding and Decorating The Lotus Biscoff CheesecakeAbout 1 hour before serving, remove the cheesecake from the fridge and move it to the freezer. Freeze for about 15-20 minutes until the top of the cake is firm to the touch.
- While your cake is in the freezer, scrape out the last of the cookie butter from the jar–you should have about 1/4 cup-into a heatproof or microwave safe bowl.
- Microwave the Biscoff Cookie Butter for 30 seconds until the cookie butter is just melted. We do not want it very hot.
- Remove the cake from the freezer and pour the melted cookie butter onto the center of the cake. Spread the cookie butter out towards the edge, but leave about a 1″ ring of exposed cake showing.
- There won’t be enough Cookie Butter to cover the entire top of the cake but that’s ok–we’ll cover up the exposed parts with whipped cream.
- To release the cake from the pan, run a thin, sharp knife around the edge between the cake and the pan to loosen. Make sure to get all the way down to the crust.
- Gently release the sides of the springform pan and remove.
- If you see any air pockets showing or uneven bits, you can use a butter knife to smooth out the sides and edges of the cake.
- Once the cake has been umolded, you can finish decorating the top. What I like to do is put whipped cream into a piping bag with a star tip and pipe on little cream rosettes to cover the exposed top of the cake.
- Sprinkle the whipped cream with additional crushed Lotus Biscoff cookies and chill until the cookie butter is set.
- Slice, serve, and enjoy!


This recipe sounds delicious! I love that it is a no bake cheesecake. The flavors sound like a perfect combo!
Thank you for sharing with us!
Looks soooo good!
My mouth is watering! Can’t believe it’s no bake🙌