Easy Cheesecake Bars

This post may contain affiliate links, see my disclosure policy for details.
If you love cheesecake but don’t love the commitment of making a full one, these Easy Cheesecake Squares are for you. Same creamy flavor, quicker bake time, and easy-to-serve squares that are great for sharing.

I’ve been baking cheesecakes for over 15 years and even ran my own cheesecake business, so I know firsthand that making a full cheesecake can feel like more work than you want to take on—especially for a casual dessert.
That’s why I love these cheesecake bars. They deliver the same rich, classic New York–style flavor in smaller, perfectly portioned squares that bake much faster than a traditional cheesecake.
I’ve made this recipe countless times for potlucks, birthdays, and bridal showers, and it’s always a hit. These bars are easy to serve, great for sharing, and perfect when you want a crowd-pleasing dessert without the time commitment of a full cheesecake.
Why I love making Cheesecake Bars
- Easier than a full-size cheesecake, and the smaller bars are a big hit with kids.
- No springform pan required (honestly, that alone sells it).
- All the rich, classic cheesecake flavor — just in fun little bars that won’t put you into a dessert coma.
- This cheesecake bar recipe has been made and loved for years, and it never disappoints.
- Way faster and simpler than a traditional cheesecake. They set quicker too… which means cheesecake happens sooner.
- Great for making ahead, and they store and freeze beautifully.

Ingredients You’ll Need
The ingredients for this easy cheesecake bars recipe are so common you’re likely to have them in your kitchen right now!
For the Graham Cracker Crust

- Graham Crackers– I use one sleeve (9 whole graham crackers). I prefer Honey Maid brand.
- Granulated Sugar – This was a trick I learned in culinary school; the sugar adds sweetness, but it’s mostly there to glue the crumbs together.
- Unsalted Butter – Melted to bind the crumbs easily and give you a crisp crust.
For the Cheesecake Filling
- Full Fat Cream Cheese – Softened and at room temperature. Room temperature ingredients will make sure there are no lumps in your cheesecake squares!
- Full Fat Sour Cream – Room temperature
- Granulated Sugar
- Vanilla Extract
- Lemon Juice – Use fresh for the best flavor. The lemon juice won’t make your cake taste like lemon, it will just add that classic NY style cheesecake tang.
- Large Eggs – Room temperature, for easy mixing.
Top Tip: Always use room-temp ingredients for cheesecake. Everything mixes more smoothly and bakes more evenly this way.
How To Make Cheesecake Bars
This is an abbreviated version of the complete directions found in the recipe card at the bottom of the post. Use the full instructions with temps and times for the best results.
Prepare The Pan
Step 1:
Preheat the oven to 350° and grease an 8×8″ glass baking dish with butter or nonstick cooking spray.
Step 2:
Take two pieces of foil and line the inside of the dish, overlapping one sheet horizontally and one vertically.
You’re making a cross with a little overhang of foil on each side of the pan for easy cake removal. Spray or grease the foil layer too.
Make The Graham Cracker Crust
Step 1:
Place the graham crackers in a large plastic bag and crush/pulverize to fine crumb with a rolling pin or the bottom of a saucepan. You can also use a food processor.
Step 2:
Pour the graham cracker crumbs into a bowl and add the sugar. Then pour in the melted butter and stir until the mixture looks evenly combined and moist.

Step 3:
Scoop the crust mixture into the foil lined baking dish. Press down the crumbs until evenly packed and distributed at the bottom of the dish. (I like to use the bottom of a clean drinking glass for this.)

Step 4:
Bake the crust at 350° for 10 minutes or until the edges are just starting to brown. Then remove the crust from the oven and turn the oven temp down to 325°.
Make The Cheesecake Filling
Step 1:
In the bowl of a stand mixer, use the paddle attachment to beat the softened cream cheese speed until smooth.
Add the sour cream and beat until the mixture is smooth and well combined.
Step 2:
Add in the sugar and mix for 30 seconds. Scrape down the sides and bottom of the bowl with a rubber spatula.
Add the vanilla and the lemon juice and mix on medium low until just incorporated.
Step 3:
Add the eggs one at a time, mixing thoroughly after each addition.

Step 4:
Once eggs are added to the batter, do a final scrape of the sides and bottom of the bowl, and give a final mix on low speed for about 10 seconds.
Make A Waterbath And Bake The Cheesecake
Step 1:
Pour the batter over the prepared crust. Set the 8″×8″ baking dish inside a slightly larger pan, like a 9″×13″ baking dish or a roasting pan.
Make a water bath by carefully pouring hot water into the 9″×13″ pan until it reaches about halfway up the sides of the 8″×8″ baking dish.
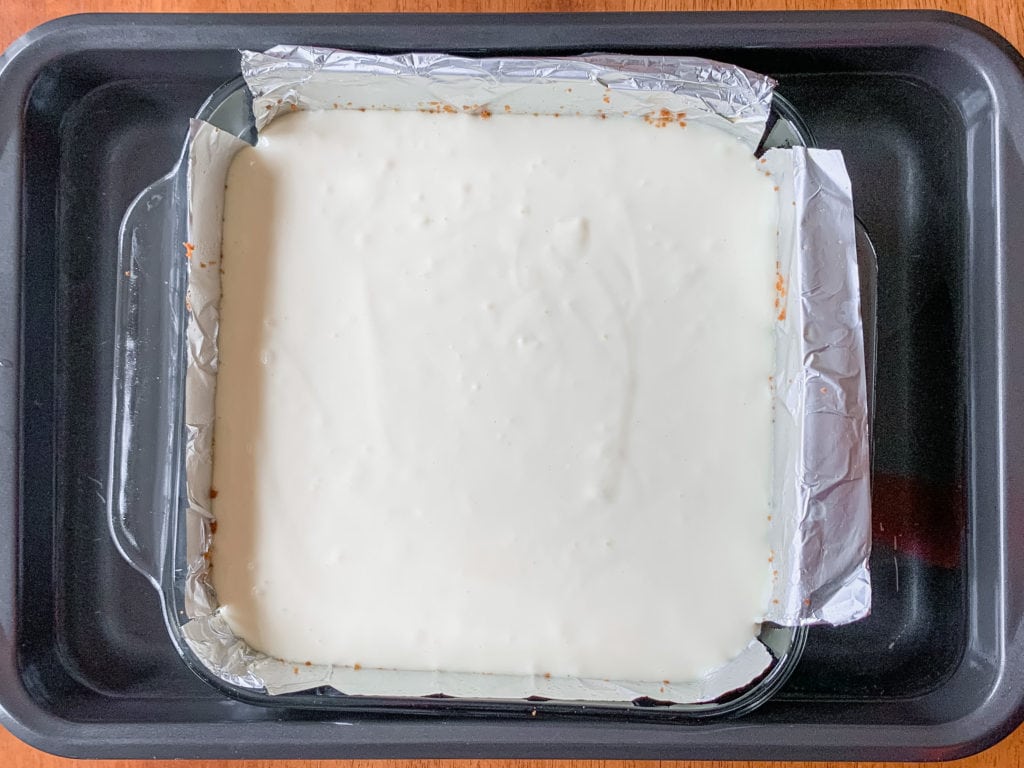
Step 2:
Carefully place the pans in the oven and bake for about 45 minutes, until the edges are puffed and the center still has a slight jiggle (it shouldn’t look soupy). Turn off the oven.
Crack open the oven door for 1 minute to allow most of the heat to escape, then shut the door and let the cheesecake sit in the oven for an hour.
Step 3:
After an hour, remove the cake from the water bath, let it cool to room temperature, and then refrigerate for at least 8 hours, but preferably overnight to set.
Once the cheesecake is fully set, carefully lift it out of the pan using the overhanging foil and transfer it to a cutting board.
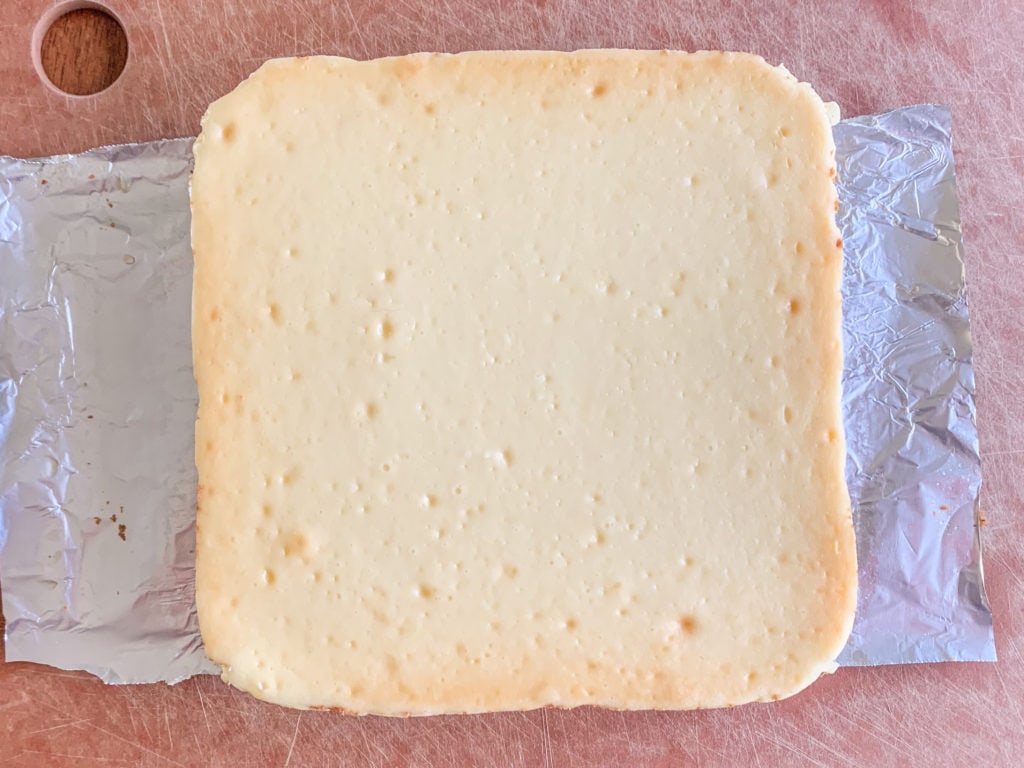
How To Cut Cheesecake Into Squares

Step 1:
Remove the foil and get a damp kitchen towel to clean the knife between slices.
Step 2:
Using a large non-serrated knife, trim the edges of the cake to even up the sides.
Step 3:
Cut the cheesecake into 12 bars, using an up and down motion vs a sawing motion.
Wipe the knife clean after each cut. This makes for neater squares.
Note: See the “Tips” section for how to get clean cheesecake slices every time
Important Tips
- Use full-fat ingredients. Skip low-fat cream cheese and sour cream. They have more water and stabilizers, which can dry out your cheesecake as it bakes.
- If you don’t have a stand mixer, you can use a handheld electric mixer.
- Go easy on the eggs. Add them last and mix just until combined. Overbeating can lead to cracks.
- Don’t skip the water bath. Cheesecake likes gentle, even heat. A water bath helps the sides rise high, while the cake sinks in the middle. It also helps to prevent cracking..
- Cool it slowly. Let the cheesecake sit in the turned-off oven with the door cracked. This prevents temperature shock and helps the center and edges cool together.
- Don’t overbake. Look for puffed edges and a small, moist dip in the center. It should still jiggle slightly, but not look like soup. It’ll finish setting as it cools.
How to Cut Cheesecake Cleanly
- Use a large, sharp knife and cut straight down, no sawing or dragging. I slice straight down first, then gently push the knife against the crust to separate the pieces.
- Repeat the straight up-and-down motion to cut the cheesecake into smaller, clean squares.
- Use the damp towel to wipe the knife clean in between each cut. This will give you a smoother and tidier cut.

Cheesecake Squares Variations
From the crumb crust to the delicious toppings to everything in between, there are tons of tasty ways to transform your cheesecake squares.
- Standard toppings include fresh fruit like sliced strawberries and fresh blueberries or canned cherry pie filling.
- If you love chocolate, consider swapping out the graham cracker crust for Oreos or chocolate graham crackers and adding some mini chocolate chips to the cheesecake filling. You can use my Cookies and Cream Cheesecake or Peanut Butter Pie recipes for guidance and easy instructions on making the chocolate crust.
- After pouring the cheesecake batter over the crust, you can add a swirl of strawberry jam before baking.
- After baking, top with whipped cream, fresh berries, caramel sauce, or a simple chocolate ganache like the one I use in my Chocolate Chip Cheesecake!
Lemon Cheesecake Bars
Add a tablespoon of lemon zest in addition to the lemon juice to the cheesecake filling. After baking and cooling, top with a lemon whipped cream I use with this beautiful Blackberry Lemon Cake.
Blueberry Cheesecake Bars
Add a teaspoon of lemon zest to the cheesecake filling, and after cooling, top with the blueberry compote from my Blueberry Cheesecake Recipe.
Strawberry Cheesecake Bars
Top the baked cheesecake squares with strawberry jam, strawberry compote, or use the strawberry topping I use for my Mini Strawberry Cheesecakes.

Can I Make Cheesecake Bars Ahead?
Absolutely! You can make these creamy cheesecake bars up to two days ahead!
But don’t let them sit much longer, after day three or four, the crust starts getting a little soft.
How to Store Cheesecake
Keep leftover cheesecake squares in an airtight container in the fridge for up to 5 days.
How to Freeze Cheesecake Bars
Cheesecake bars can be frozen either whole or as individual squares. Store in a freezer safe airtight container for 2 months and thaw in the fridge before slicing or eating.
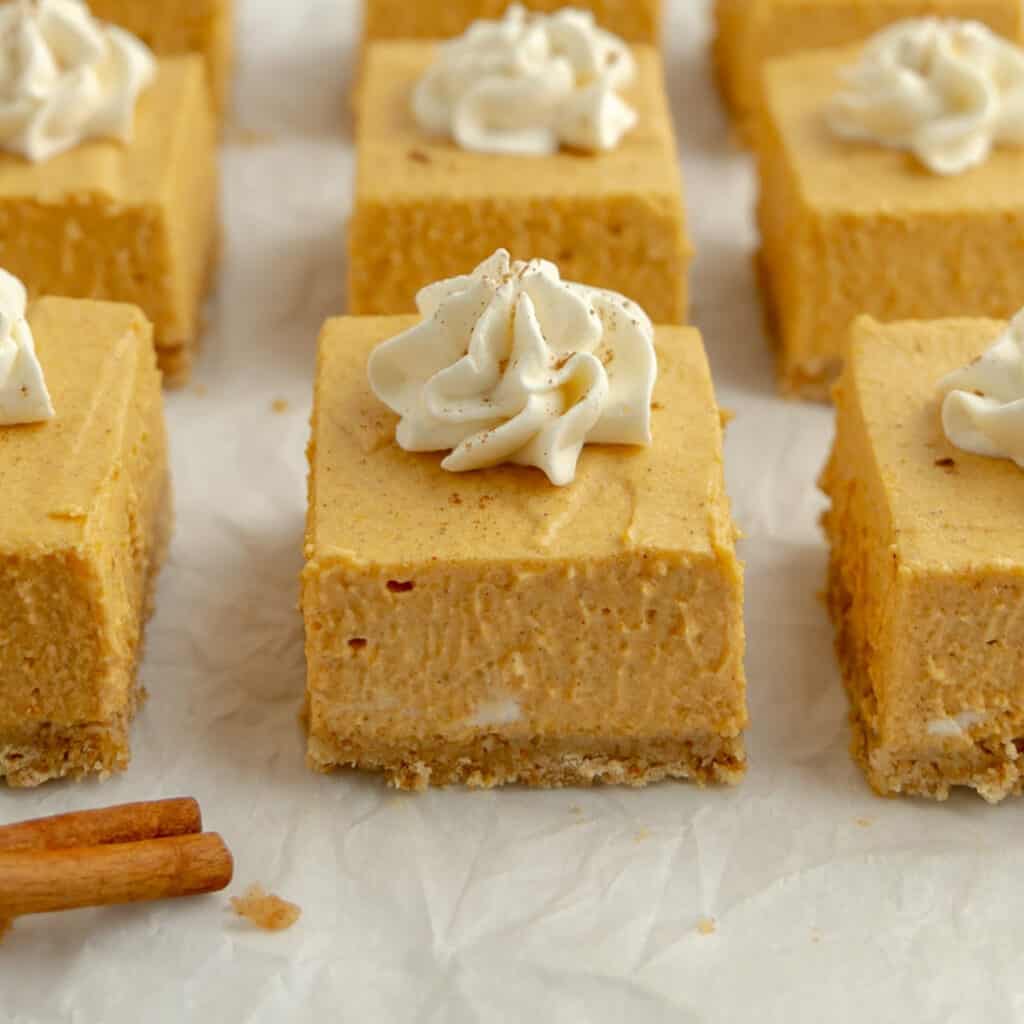
More Cheesecake Recipes:


Save This Recipe
Just enter your email below and we will send this recipe right to your inbox, plus we will send more yummy recipes and ideas.

The Best Cheesecake Bars Recipe
Ingredients
Graham Cracker Crust
- 1 pack (9 whole crackers) of graham crackers
- 1 tablespoon of granulated sugar
- 5 tablespoons unsalted butter, melted
Cheesecake Filling
- 16 ounces of cream cheese, softened and at room temperature
- 5 tablespoons of sour cream
- 2/3 cup granulated sugar
- 1/2 teaspoon vanilla extract
- 2 tablespoons fresh lemon juice
- 2 large eggs, room temperature
Instructions
Prep The Pan
- Preheat the oven to 350° and grease an 8×8" glass baking dish with butter or cooking spray. Line the inside of the pan with two pieces of foil, placing one sheet across the pan and the other perpendicular to criss-cross. Leave a little foil hanging over each side to easily lift the cake out once it’s baked. Grease the foil layer too.
Make The Graham Cracker Crust
- Place the graham cracker in a ziptop bag and crush with a rolling pin to get fin crumbs. Add the crumbs to a bowl and add the sugar.
- Pour the melted butter over the crumbs and stir until the mixture looks evenly moistened. Dump crumbs into the foil lined baking dish.
- Using the bottom of a clean drinking glass, press down the crumbs until evenly packed and distributed at the bottom of the dish.
- Bake the crust at 350° for 10-12 minutes or until the edges are just starting to brown.
- Remove the crust from the oven and turn the temperature down to 325°.
Make The Cheesecake Filling
- In the bowl of a stand mixer, beat the cream cheese at medium low speed until smooth. Add the sour cream and beat until the cheese and sour cream mixture are smooth and well combined.
- Next, add in the sugar. Mix for 30 seconds and then scrape down the sides and bottom of the bowl with a rubber spatula.
- Add the vanilla and the lemon juice and mix on medium low until just incorporated.
- Mix in the eggs one at a time, making sure each one is fully blended before adding the next one.
- Once eggs are added to the batter, do a final scrape of the sides and bottom of the bowl, and give a final mix on low for about 10 seconds. Pour the batter onto prepared crust.
Baking And Cooling
- Make a water bath by placing the 8"x 8" pan into a slightly larger pan–like a 13"x 9" or a roasting pan. Fill the 13"x 9" pan with enough hot water to match the level of cheesecake batter in the 8"x 8" baking dish.
- Carefully place the pans into a 325° oven.
- Bake the cheesecake for 45-50 minutes. The edges of the cake should be puffed and the center slightly jiggly, but not cracked. After the cake has baked, shut off the oven.
- Open the oven door a crack for 1 minute to let some heat out. Then shut the door and let the cheesecake sit in the oven for another hour.
- After an hour, remove the cake from the water bath and let it cool completely. Refrigerate for at least 8 hours, or preferably overnight, before slicing.
How To Cut Cheesecake Into Squares
- Using the overhanging pieces of foil, carefully remove the cake from the pan and set it onto a cutting board. Remove the foil from the cake at this point too.
- Dampen a kitchen towel with warm water and set aside.
- Using a large kitchen knife, trim off the edges of the cake to even up the sides and make a neat square. Then using a straight up and down motion, cut the cheesecake into twelve bars. Note: I like to cut four long strips first and then divide each of the strips into three squares.
- Use the damp towel to wipe the knife clean in between each cut. This makes for neater, less messy squares. Top with a variety of toppings or serve as is with a little whipped cream. Enjoy!


These look amazingly delicious!
These look delicious! I am such a big fan of cheesecake and strawberries!
Looooks super moist! Love this-
Could I double and make a 13×9 and use a 15×11 for the water bath? 🤔
Yes!
Can I eat same day?
You could. The bars just need to be baked off early enough that they have 6-8 hours of setting time.